Capacity Scheduler is mainly designed for multitenancy, where multiple organizations collectively fund the cluster based on the computing needs. There is an added benefit that an organization can access any excess capacity not being used by others. This provides elasticity for the organizations in a cost-effective manner.
In the previous post, we have seen installing and configuring capacity scheduler. The fundamental unit of YARN is a queue. The user can submit a job to a specific queue. Each queue has a capacity defined by cluster admin and accordingly share of resources are allocated to the queue.
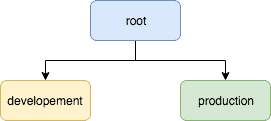
Let’s create 2 queues under the root queue as shown below:
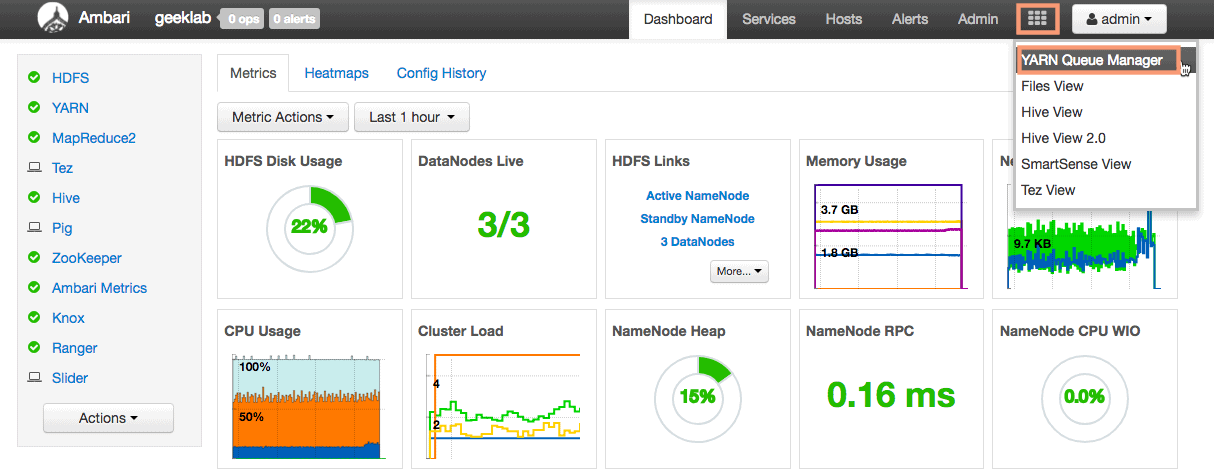
From ambari dashboard, go to “YARN queue Manager” as shown below:
We will delete the default queue under root and create 2 more queues :
1. Production (70% capacity)
2. development (30 % capacity)
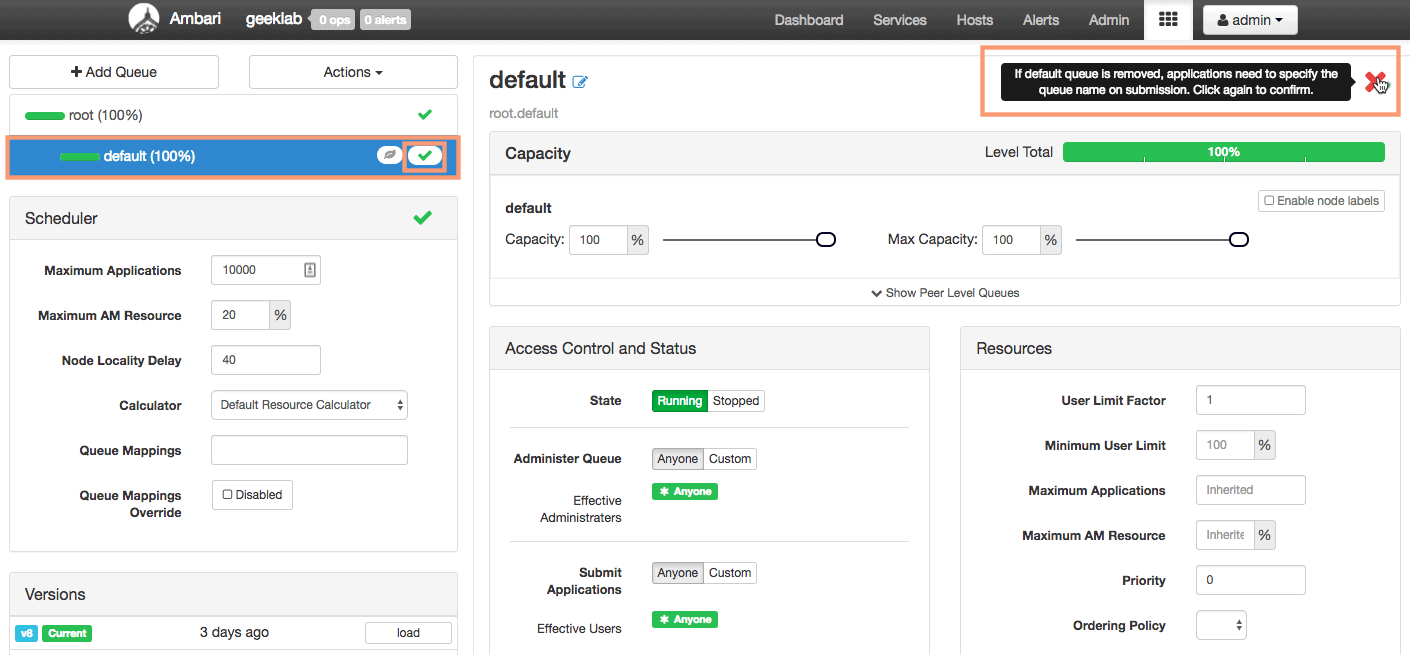
1. Delete the default queue
To delete the default queue click the default queue in the left sidebar and click the “x” button twice to delete the queue.
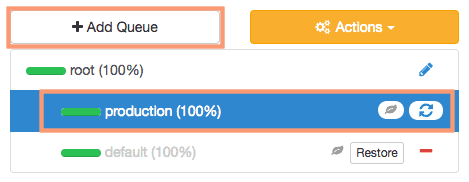
2. Add a new queue
To add a new queue, click the “Add queue” button in the left sidebar. The format to specify a queue name is :
[parent queue name].[child queue name]
So for our example, to create the production queue, we will give the queue name as “root.production”.
3. Configuring queue capacity
Once the queue is created we have to specify the queue capacity as shown below.
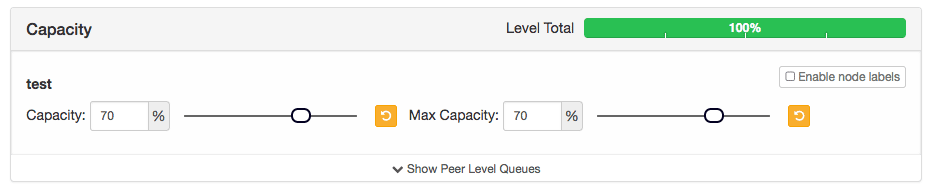
Here,
Capacity – This is the reserved capacity of the queue. This is the capacity that the queue has to compulsory get if required.
Max Capacity – This is the Hard limit on the capacity of queue. The queue can acquire a capacity up to “Max Capacity” if the capacity if free.
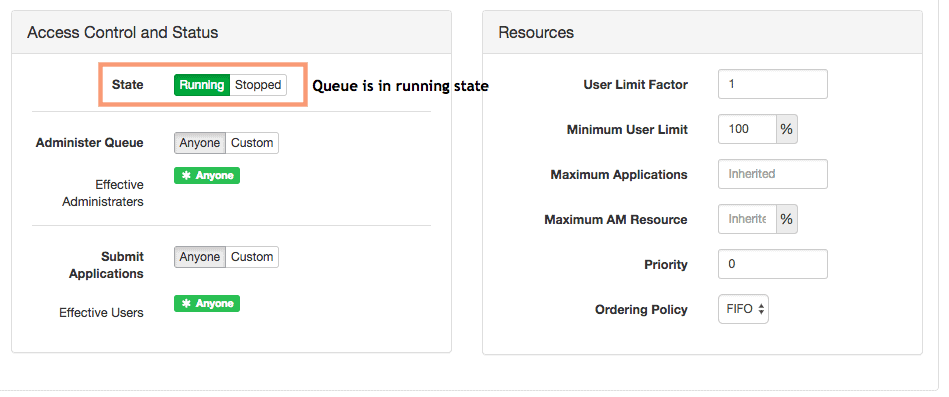
4. Configuring “Access Control and Status” and “Resources” of queue
We generally do not change the values of “Access Control and Status” and “Resources” parameters. I would keep the default settings as intact.
We will now go ahead and create the 2nd queue as well with the queue capacity of 30%. The queue name will be “root.delevelopment“.
5. Save and Restart ResourceManager
Once you have configured all the queues, we need to save the configuration and restart the ResourceManager for the config to be effective.
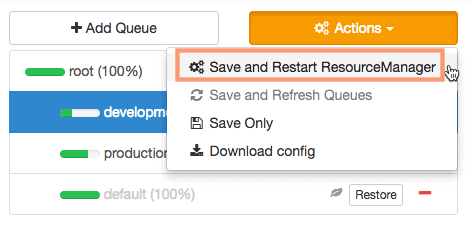
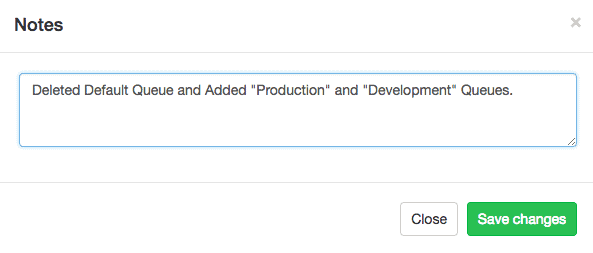
Provide an appropriate descriptive note while saving the configuration.
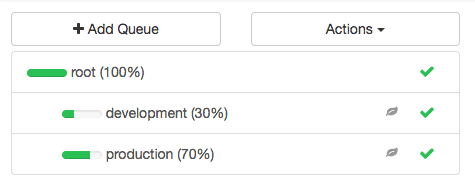
The end result should look like below:
6. Verify “Capacity Scheduler” property
We can also view the “Capacity Scheduler” property to view the changes we made. Goto Services > YARN > Configs and search for the property “Scheduler” in the filter box.
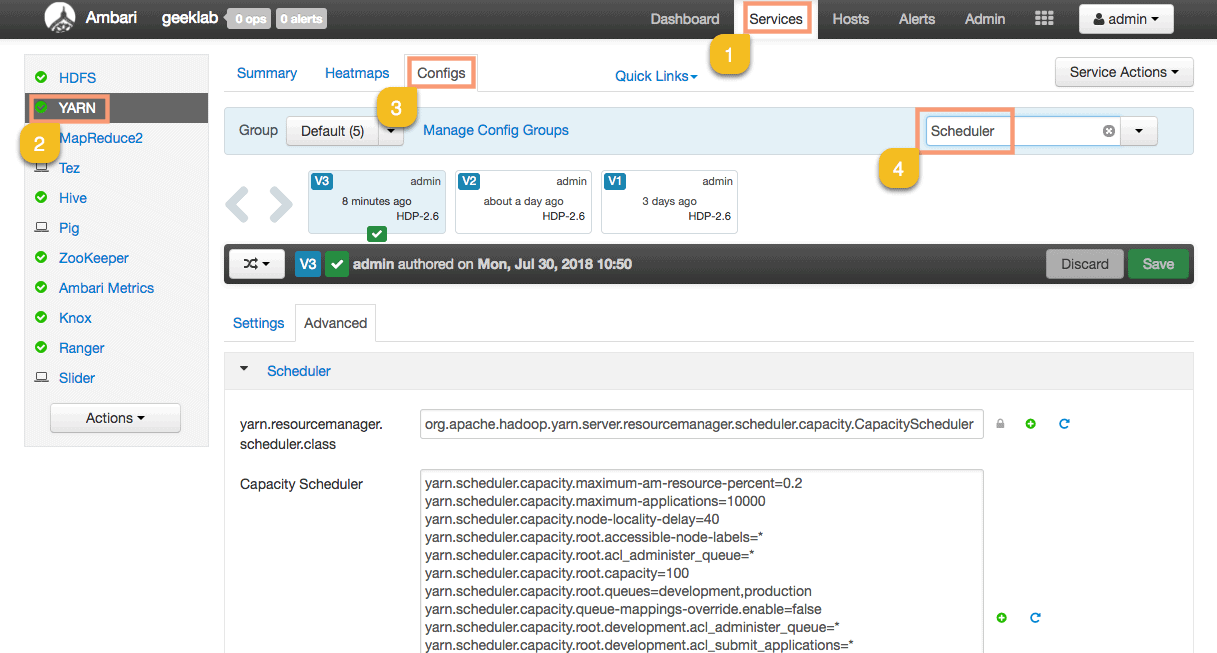
Here is the new config with the configuration settings of the new queues (production and development):
yarn.scheduler.capacity.maximum-am-resource-percent=0.2
yarn.scheduler.capacity.maximum-applications=10000
yarn.scheduler.capacity.node-locality-delay=40
yarn.scheduler.capacity.root.accessible-node-labels=*
yarn.scheduler.capacity.root.acl_administer_queue=*
yarn.scheduler.capacity.root.capacity=100
yarn.scheduler.capacity.root.queues=development,production
yarn.scheduler.capacity.queue-mappings-override.enable=false
yarn.scheduler.capacity.root.development.acl_administer_queue=*
yarn.scheduler.capacity.root.development.acl_submit_applications=*
yarn.scheduler.capacity.root.development.capacity=30
yarn.scheduler.capacity.root.development.maximum-capacity=30
yarn.scheduler.capacity.root.development.minimum-user-limit-percent=100
yarn.scheduler.capacity.root.development.ordering-policy=fifo
yarn.scheduler.capacity.root.development.priority=0
yarn.scheduler.capacity.root.development.state=RUNNING
yarn.scheduler.capacity.root.development.user-limit-factor=1
yarn.scheduler.capacity.root.priority=0
yarn.scheduler.capacity.root.production.acl_administer_queue=*
yarn.scheduler.capacity.root.production.acl_submit_applications=*
yarn.scheduler.capacity.root.production.capacity=70
yarn.scheduler.capacity.root.production.maximum-capacity=70
yarn.scheduler.capacity.root.production.minimum-user-limit-percent=100
yarn.scheduler.capacity.root.production.ordering-policy=fifo
yarn.scheduler.capacity.root.production.priority=0
yarn.scheduler.capacity.root.production.state=RUNNING
yarn.scheduler.capacity.root.production.user-limit-factor=1
How to run a Job when Default queue is not present
As a part of configuring capacity scheduler queues, we have deleted the default queue. By default, when any YARN or MapReduce job is run without specifying the queue name, the job uses the default queue. So when you delete the default queue in the YARN queue manager, you have to specify the queue name while running any job.
Running Job using a specific Queue
Let’s see how to run a MapReduce job using a specific queue. We will run the Sample mapreduce job to calculate the value of “pi” using the “production” queue.
[hdfs@nn2 ~]$ hadoop jar /usr/hdp/2.6.5.0-292/hadoop-mapreduce/hadoop-mapreduce-examples.jar pi -D mapreduce.job.queuename=production 1 10
Here,
-D mapreduce.job.queuename=production – Specifies the queue to be used. In the example we have used the “production” queue.
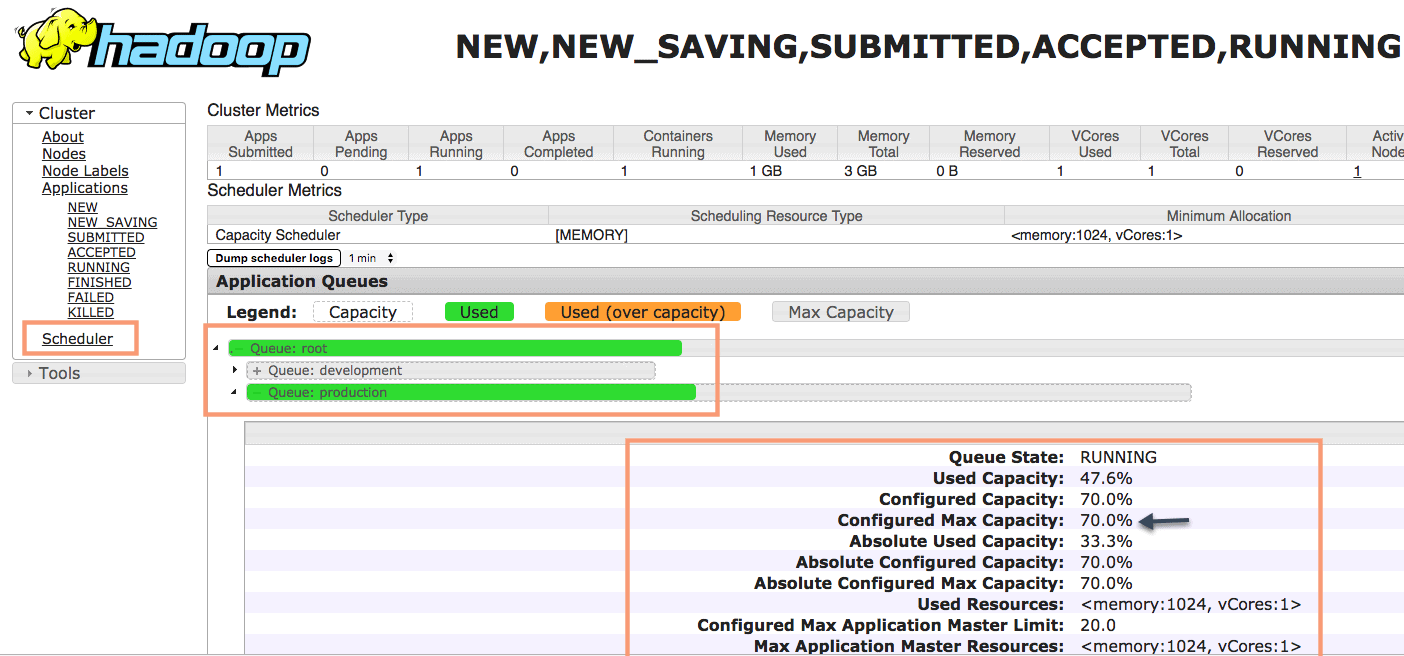
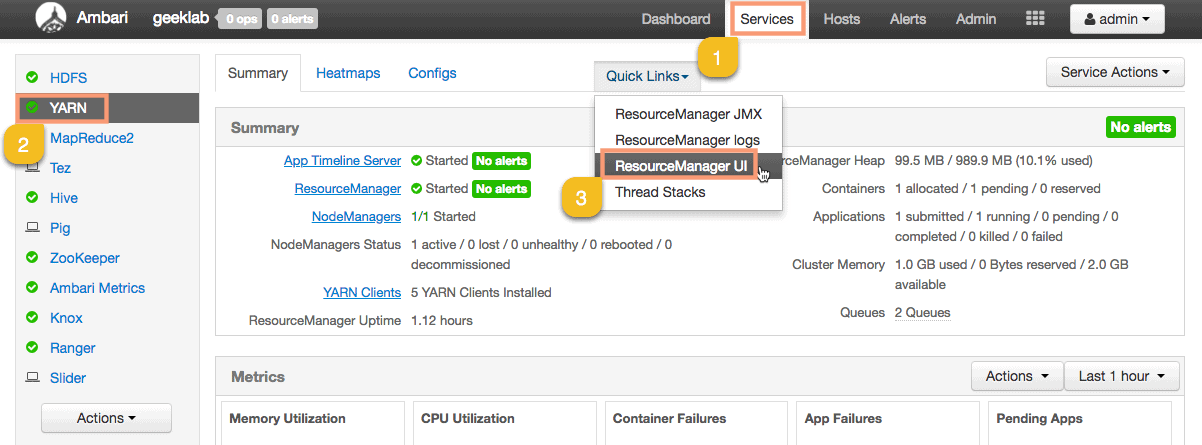
You can also view the queue utilization and status of the job in the “ResourceManager UI“. To go to the ResourceManager follow the steps given below:
As you can see the Production queue is being utilized to run the job we submitted.