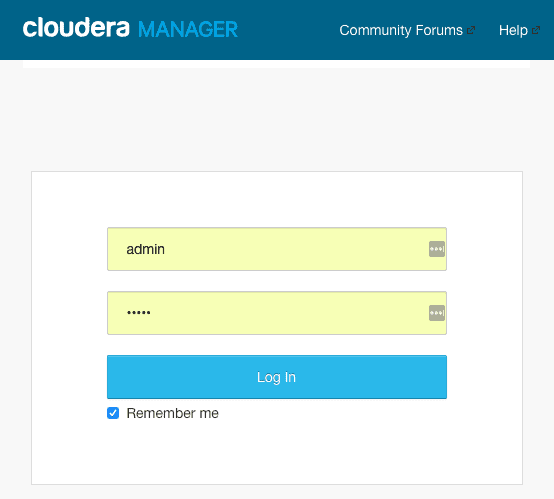
In the last post, we have seen how to install the Cloudera server manager and Cloudera Manager agents. In this post, we will begin installing the CDH cluster using the Cloudera Manager. You can point your browser to http://[cloudera manager host]:7180 and provide the default credentials of admin:admin.
Accept the license on the next page to proceed.
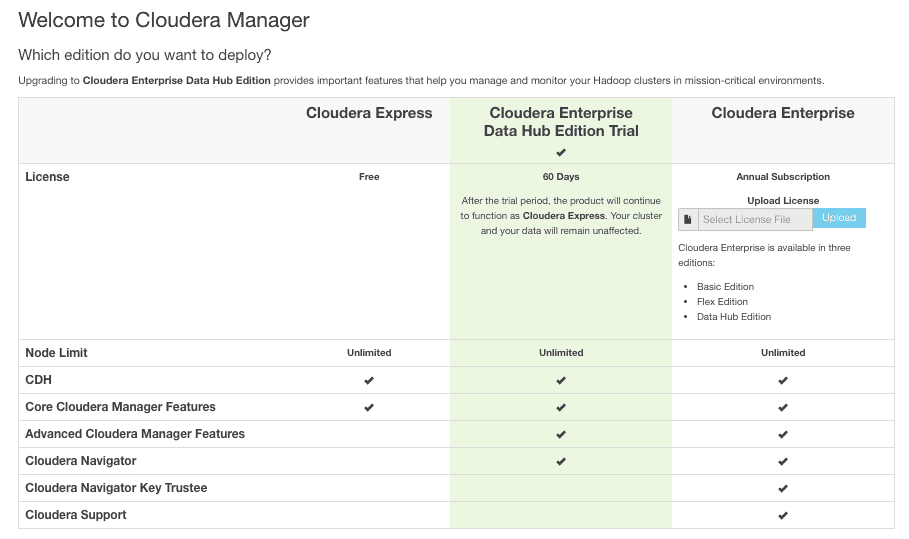
1. Cloudera Manager Editions
Cloudera Manager comes in 3 versions.
- Cloudera Express
- Cloudera Enterprise Data Hub Edition Trial
- Cloudera Enterprise
The Cloudera Enterprise Data Hub Edition Trial is a free version to use for 60 days after which it automatically gets converted into Cloudera Express. Cloudera Express is free forever version with only core Cloudera Manager features. For the setting up the LAB, we will be using the Cloudera Enterprise Data Hub Edition Trial. This gives us enough time to test out all the features of the full version of Cloudera Manager. The difference between the 3 versions and the features offered in them is as shown below.
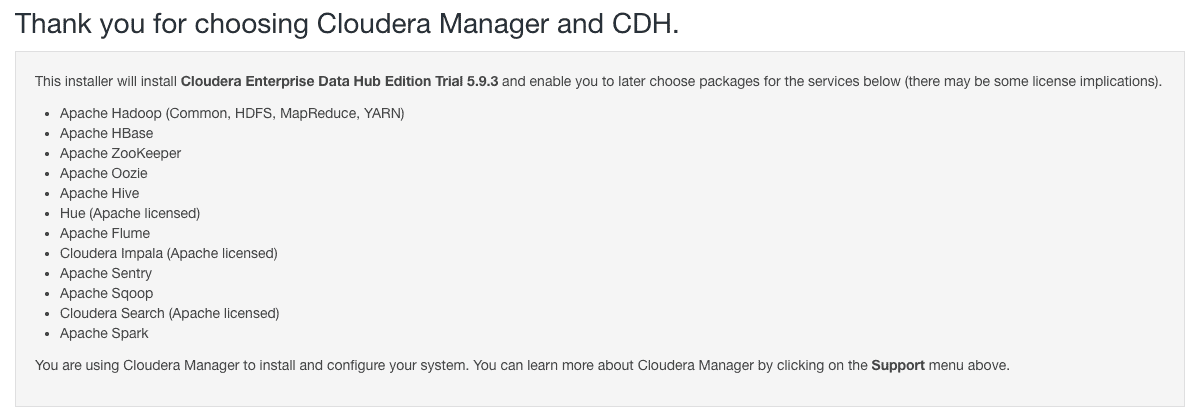
On the next screen, you will get an informational message about installing “Cloudera Enterprise Data Hub Edition Trial 5.9.3” and a list of services you can enable later on with Cloudera Manager.
2. Specify hosts for your CDH cluster installation.
In the next step, you will need to enter all the machines that are going to be part of your Apache Hadoop cluster.
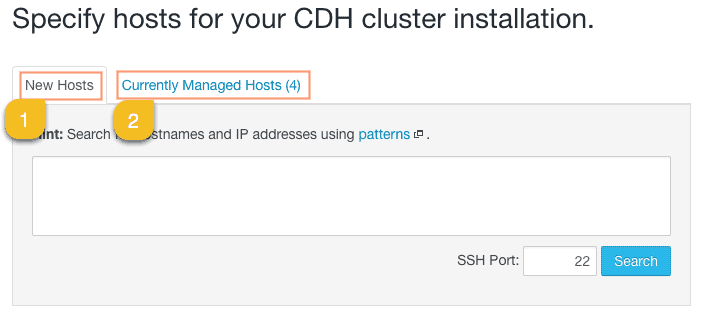
We have 2 options here:
1. New Hosts
You can specify the list of hosts (IP address or hostname) in this tab. Cloudera Manager will go ahead and check if the servers are reachable and install the “Cloudera Manager Agents” on the specified hosts.
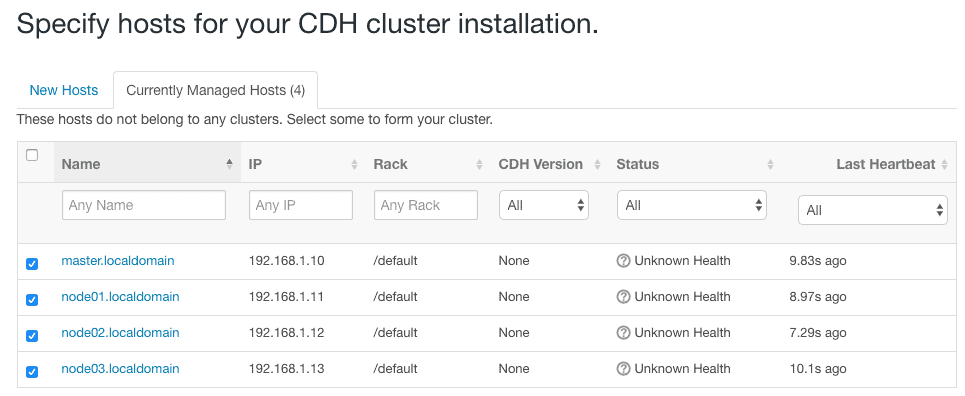
2. Currently Managed Hosts
Alternatively, you can install the “Cloudera Manager Agents” manually on each host in the cluster including master and point the /etc/cloudera-scm-agent/config.ini configuration file parameter to the Cloudera Manager Server host.
We have used the 2nd way of adding hosts, and thus we can see all the 4 hosts including master node already in the “Currently Managed Hosts” tab. We will select all the 4 hosts for the installation and proceed.
3. Cluster Installation
After the node selection, you will be presented with a few options to perform the cluster installation as shown in the following screenshot.
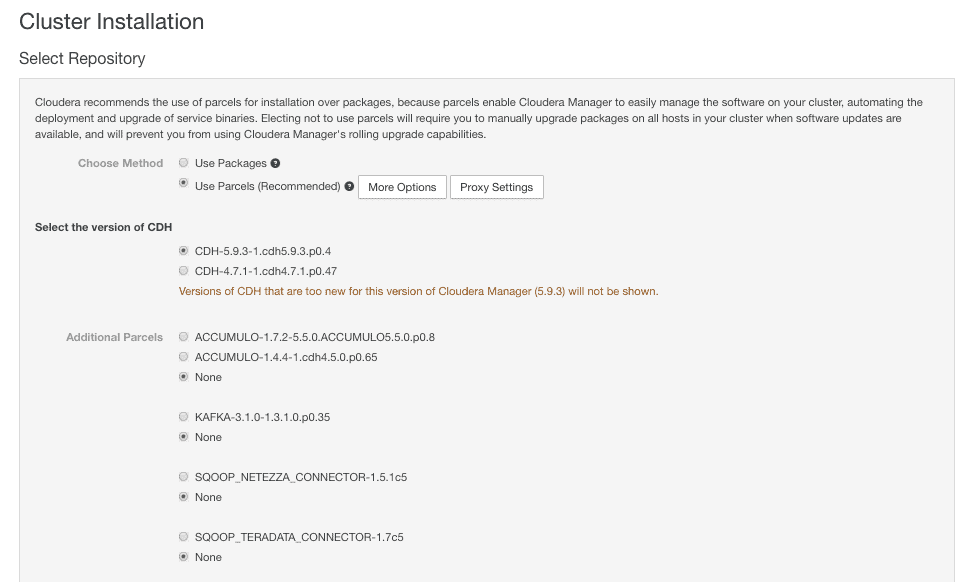
Packages V/s Parcels
The cluster installation is a five-step process. The installer provides two types of installation options: packages and parcels. Cloudera recommends the use of parcels for the below reasons:
– Cloudera Manager-specific
– Allows multiple versions of Hadoop to be present on a node simultaneously. (Although only one will be running at any given time.)
– Allows easy upgrading with minimal downtime.
– Allows easy rolling upgrades (Enterprise edition).
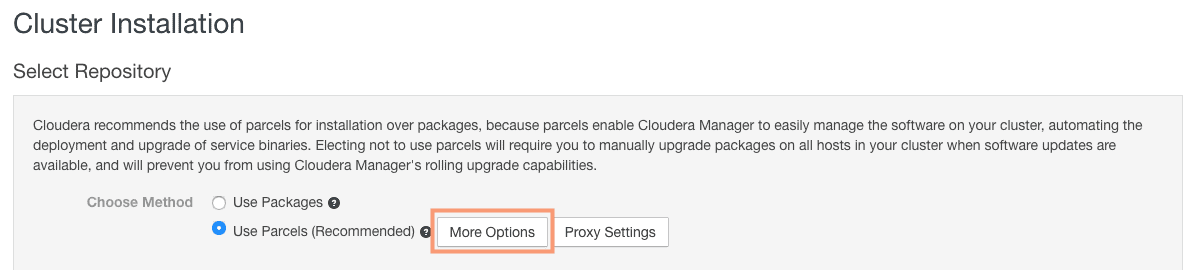
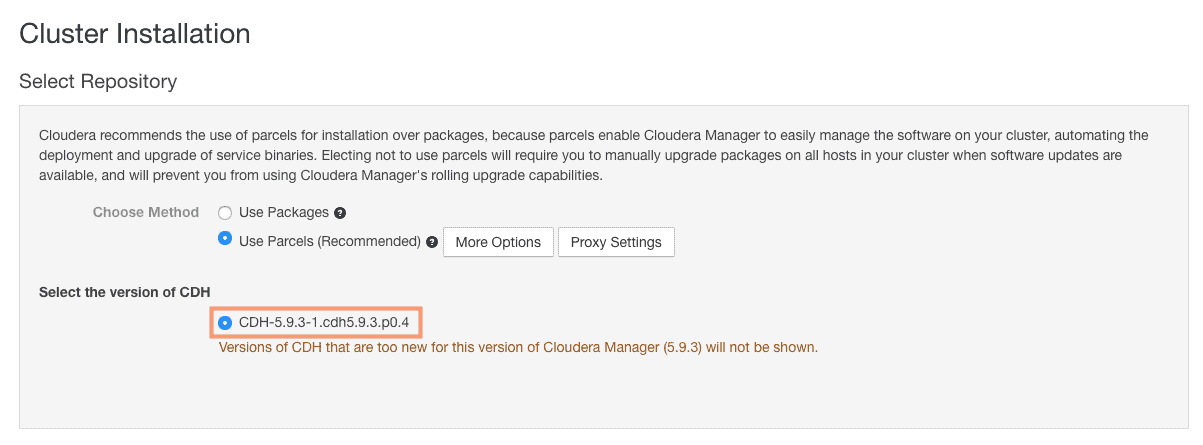
We will go ahead with the recommended parcels way of installation. Click on the “More Options” button to view the repository location settings.
We need to copy the required version of parcel in the local repository we created earlier and provide the path in the “Remote Parcel Repository URLs” settings.
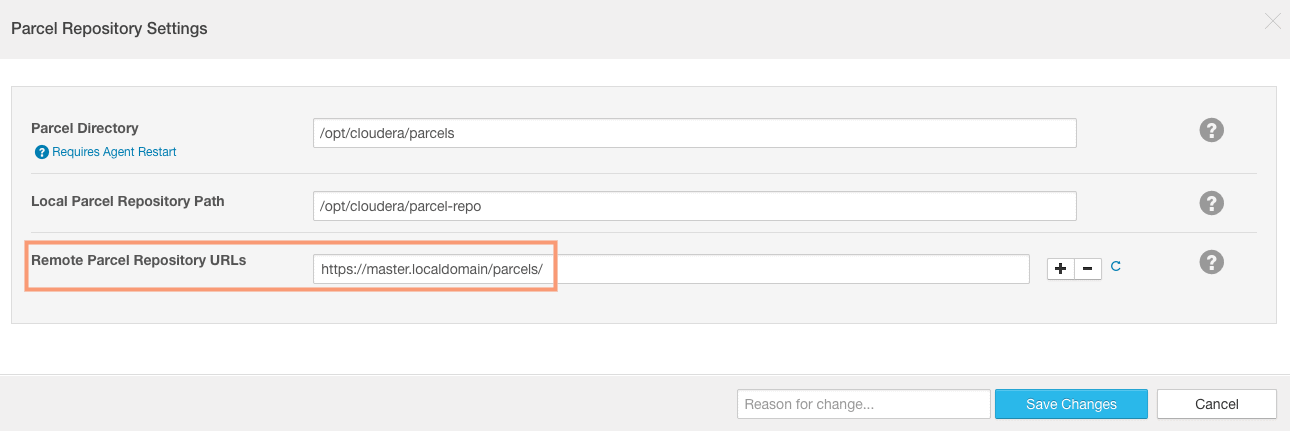
For the local repository you need to copy 2 files from https://archive.cloudera.com/cdh5/parcels/ URL:
1. The CDH5 parcel for the version you desire to install.
2. The manifest.json file.
We will not install any other component for now, thus we can proceed further with the installation. If you have set the local repository correctly, the Cloudera Manager will automatically show the version of parcel we are going to install.
Installing Selected Parcels
Cloudera Manager will go ahead and Download, distribute, unpack and activate the required parcels in each of the selected hosts for installation. You can view the Parcels being copied in the directory /opt/cloudera/parcels of each node.

Inspect hosts for correctness
The Cloudera Manager will conduct a host correctness checks post installation of parcels. You may get warnings about swapiness or transparent huge pages if you have not followed the post on OS-configuration.

I still have 2 warnings about version mismatch and java which we can safely ignore and continue with the installations.

Choose CDH services to be installed
On the next page, you can either choose a “combination of services” or “custom services” to be installed.
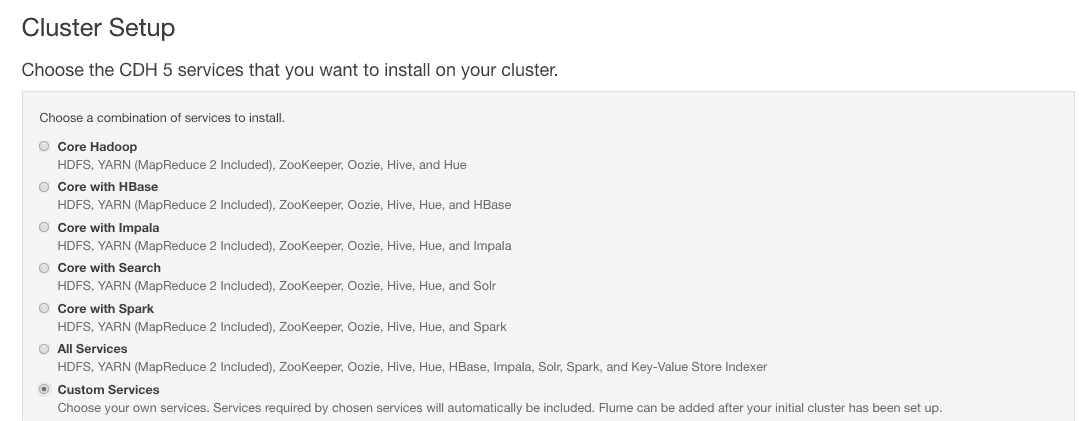
I have chosen custom services to be installed and selected the basic services “YARN”, “HDFS” and “zookeeper”.

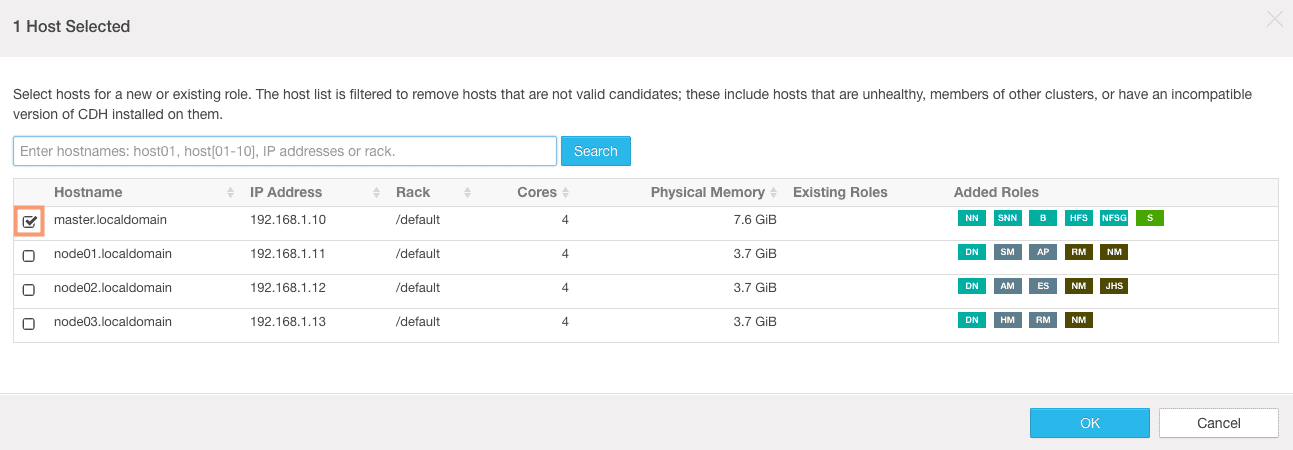
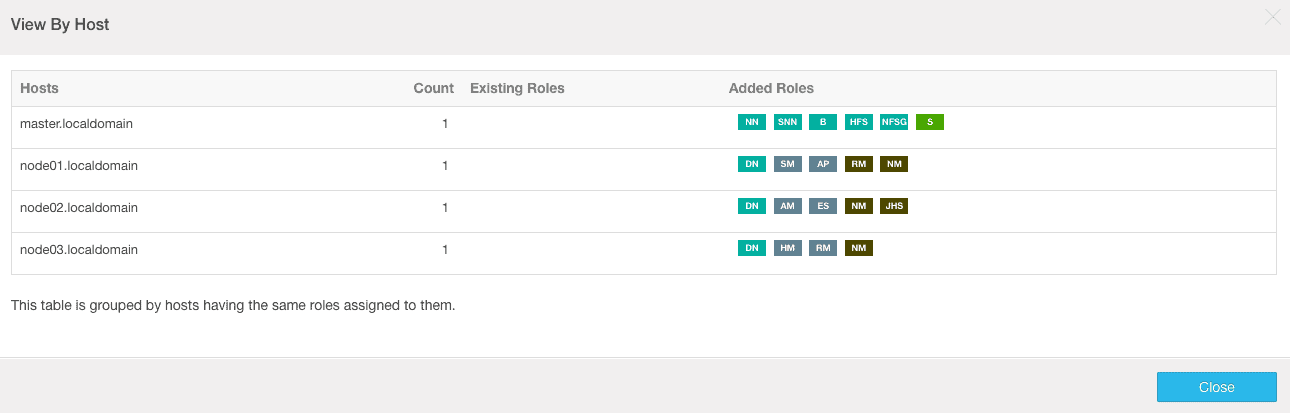
Customise Role Assignments
On the next page, you can change the role assignment for each of the nodes in the cluster. You can select the individual service like “Zookeeper” and change the default assignment of the host.
I have distributed the services across the cluster node to have a balance. Please note that – the way I have distributed the services is not a recommended way. In production, you would have specific hosts for specific service (except for few services like datanode and nodemanager). The final role assignments would look like shown below.
Database setup for Reports Manager and Activity Monitor
We need to have 2 MySql/MariaDB databases for configuring the “Reports Manager” and “Activity Monitor” on the next page.
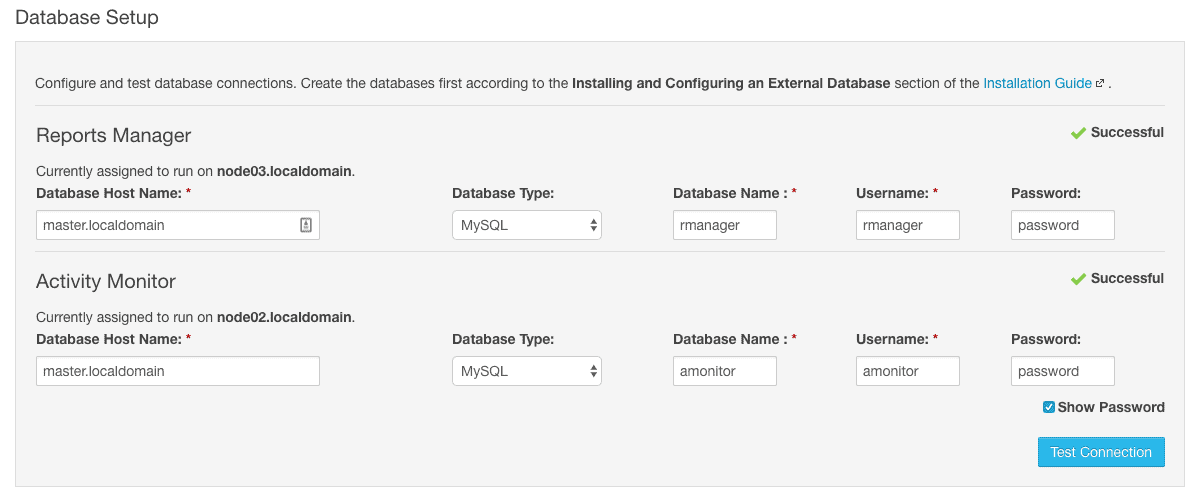
We will use the existing MariaDB setup on the master node and create new databases and users.
# mysql -u root -p
Reports Manager
MariaDB [(none)]> CREATE DATABASE rmanager;
Query OK, 1 row affected (0.00 sec)
MariaDB [(none)]> GRANT ALL ON rmanager.* TO 'rmanager'@'%' IDENTIFIED BY 'password';
Query OK, 0 rows affected (0.01 sec)
Activity Monitor
MariaDB [(none)]> CREATE DATABASE amonitor;
Query OK, 1 row affected (0.00 sec)
MariaDB [(none)]> GRANT ALL ON amonitor.* TO 'amonitor'@'%' IDENTIFIED BY 'password';
Query OK, 0 rows affected (0.01 sec)
Check the connectivity to these databases. It would fail the first time as we do not have the MySQL JDBC connector in the nodes – node02 and node03. We will go ahead and install the MySQL JDBC connectors in these hosts and test the connections again.
# yum install mysql-connector-java

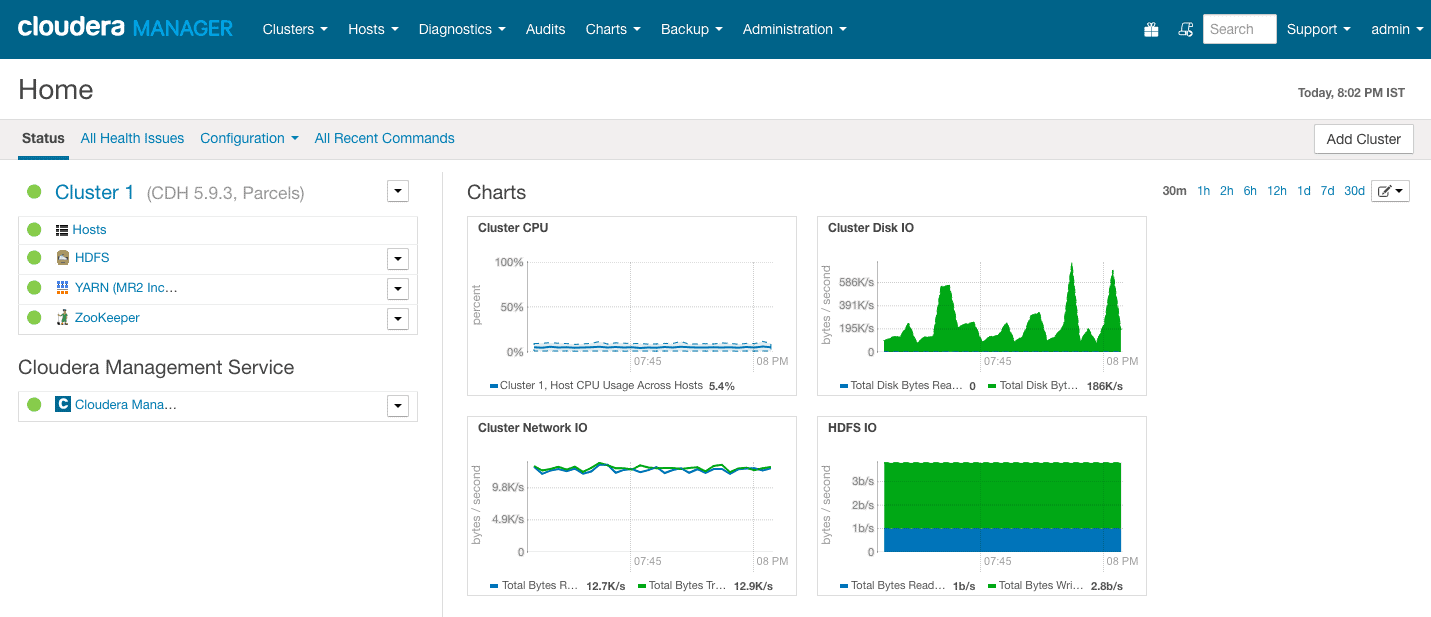
Once the installation is complete, you will be logged in to the Cloudera Manager Administrator Web console as shown in the following screenshot:
This completes the installation of Cloudera Manager and CDH5 on the cluster.