HDFS High Availability Overview
A single NameNode is a single point of failure in a Hadoop cluster. You can experience HDFS downtime from an unexpected NameNode Crash or planned maintenance of NameNode. Having a NameNode high availability setup avoids these single points of failures.
HDFS High Availability uses a pair of NameNodes
- One Active and one Standby
- Clients only contact the Active NameNode
- DataNodes heartbeat into both NameNodes
- Active NameNode writes its metadata to a quorum of JournalNodes
- Standby NameNode reads from the JournalNodes to remain in sync with the Active NameNode
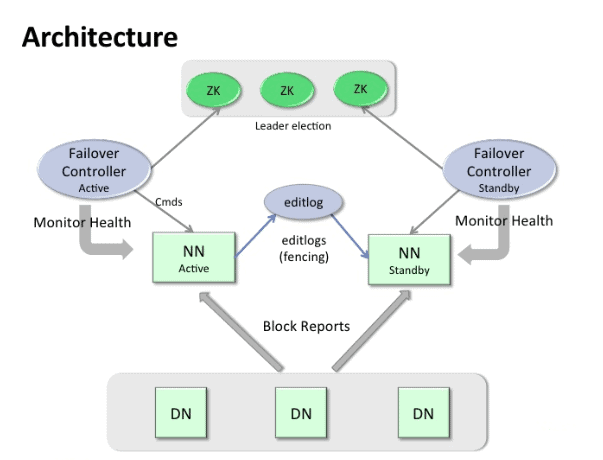
Active NameNode writes edits to the JournalNodes
– Software to do this is the Quorum Journal Manager (QJM) which is built into the NameNode
– Quorum Journal Manager waits for a success acknowledgment from the majority of JournalNodes. Majority commit means a single crashed or lagging JournalNode will not impact NameNode latency
– Uses a simple algorithm to ensure reliability even if edits are being written as a JournalNode fails.
Failover
At any given point in time, only one NameNode can be active. The other NameNode(s) act as standby NameNode(s). The standby NameNode maintains a copy of active NameNode’s state so that it can take over when the active NameNode goes down. There are 2 types of failovers:
1. Manual (detected and initiated by a user)
2. Automatic (detected and initiated by HDFS itself)
Automatic failover is controlled by the Apache Zookeeper. Apache Zookeeper is an opensource project and is a coordination service system also used by HBase. Zookeeper is one of the components in the CDH cluster. A daemon called the “ZooKeeper Failover Controller (ZKFC)” runs on each NameNode machine. Zookeeper needs a quorum of nodes for taking the decision of failover. Typical installations use 3 or 5 nodes of ZooKeeper. The ZooKeeper daemon has a low resource usage and can be installed alongside existing master daemons.
Enabling NameNode HA using Cloudera Manager
Enabling NameNode HA using Cloudera Manager is pretty easy stuff. Follow the steps given below:
1. Goto
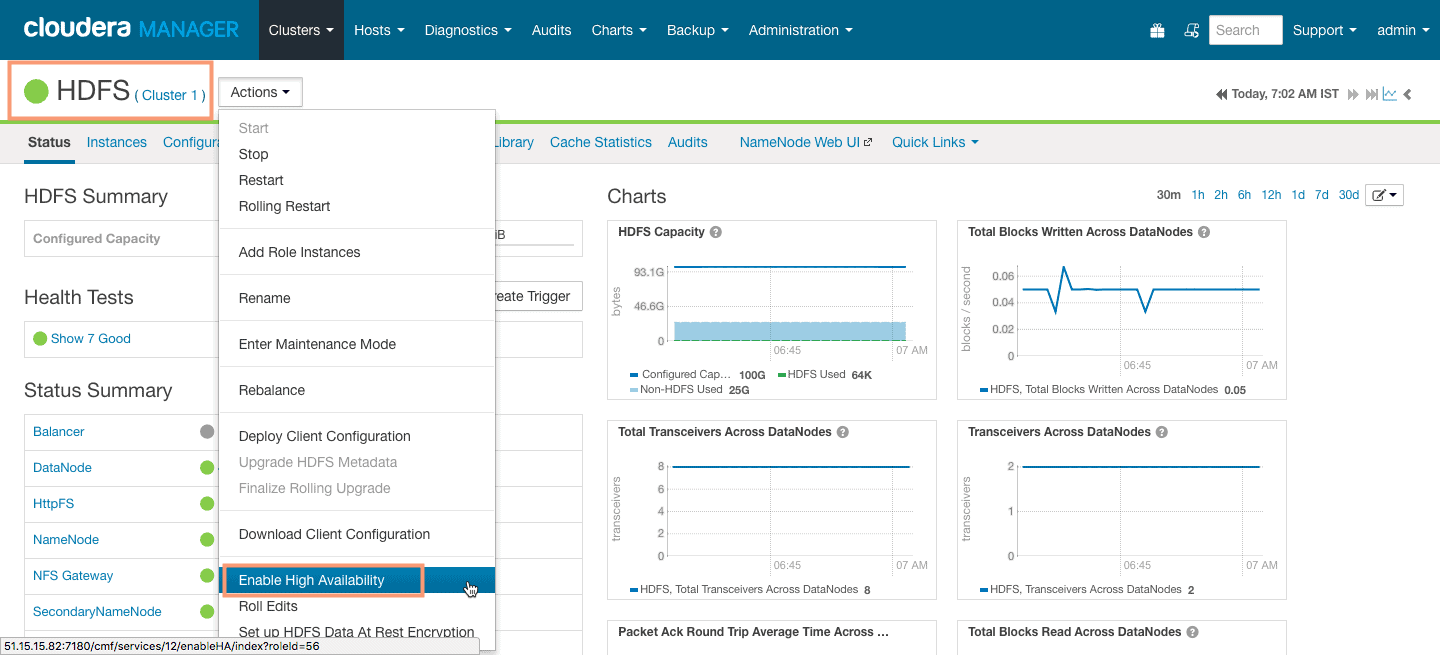
This will start the NameNode High Availability wizard which will guide you through all the steps.
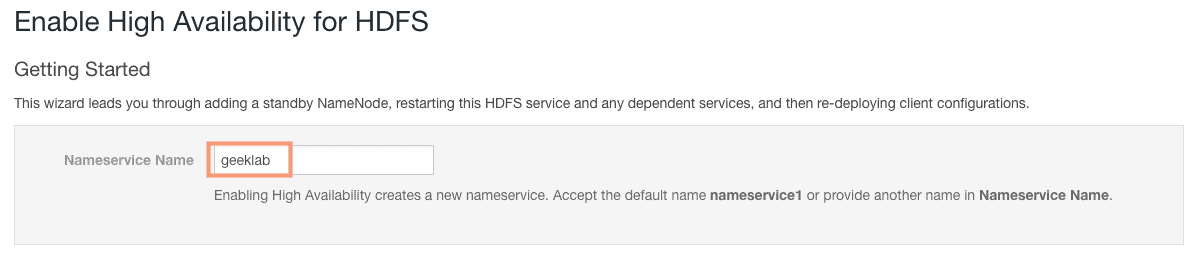
2. Enabling High Availability creates a new nameservice. Accept the default name nameservice1 or provide another name in Nameservice Name (geeklab).
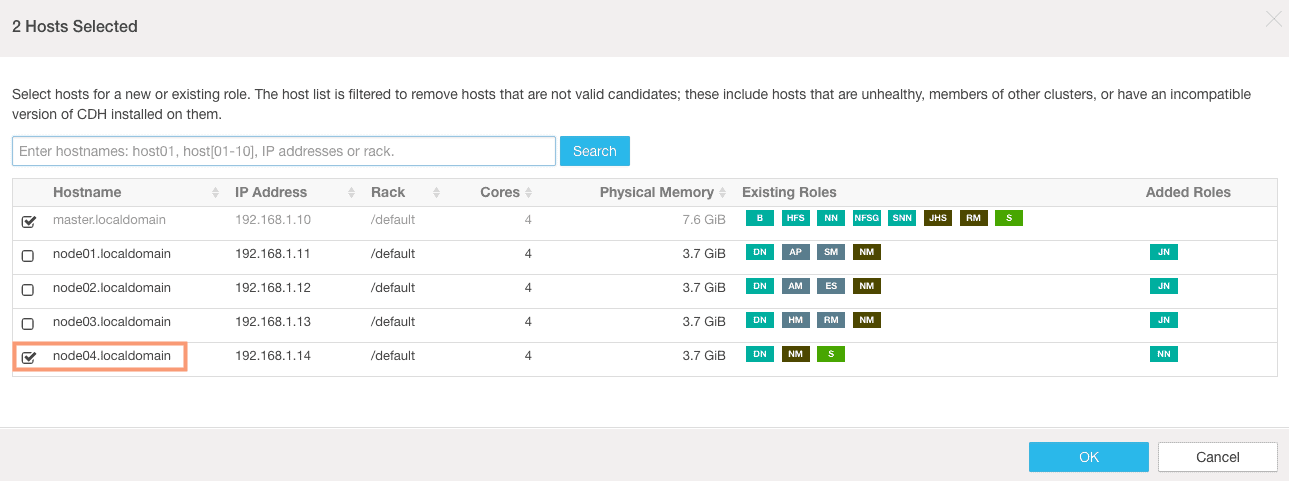
3. On the next screen, we need to assign roles for the standby NameNode and the JournalNodes.
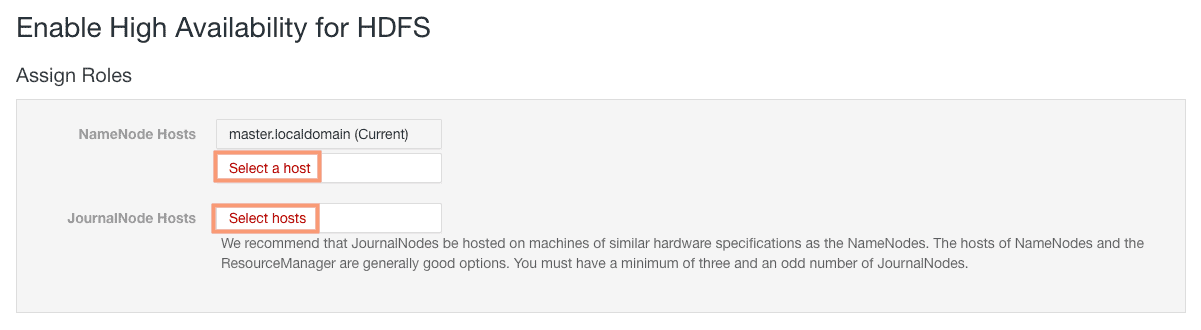
We will select node04 as our standby NameNode and node01, node02, node03 as our JournalNodes.

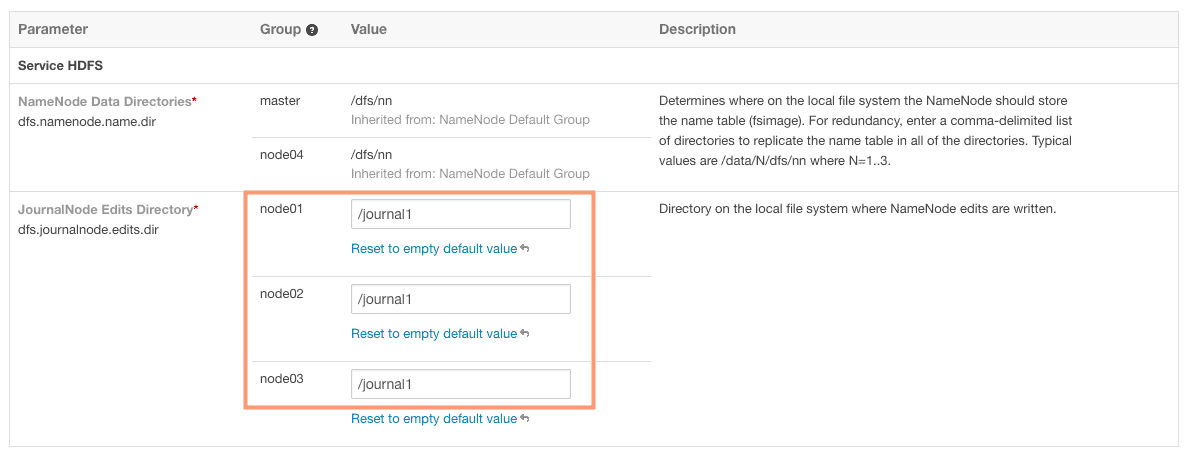
4. Define the JournalNode Edits directory on next screen. This is a directory on the local filesystem where NameNode edits are written.
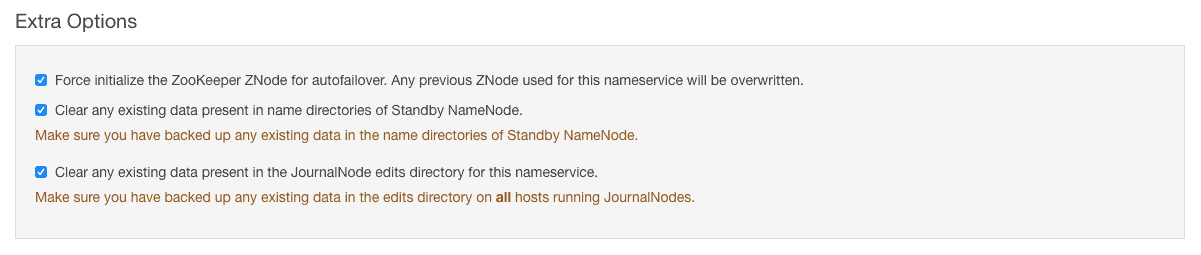
There are some extra options which by default are selected. These are basically for clearing any existing data on standby NameNode directories and JournalNode edits directories. We will keep the settings as default here.
5. Cloudera Manager will start configuring the NameNode High Availability on the next screen. You will get below error if you have some data on the current NameNode HDFS. This is expected to fail and can be ignored as we have data on our setup.

6. That’s it. The NameNode high availability configuration is completed and you should see a congratulatory message.

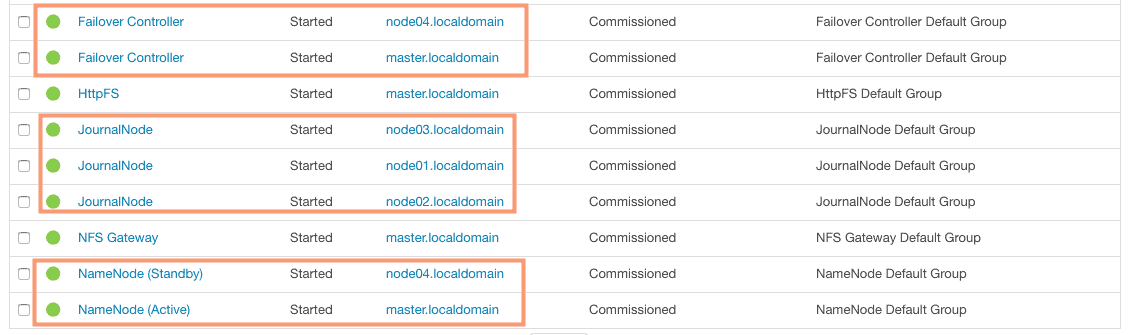
To verify the High Availability, goto Cloudera Manager > HDFS > Instances. Here we can see 3 JournalNodes, 2 Zookeeper Failover Controllers and a Active NameNode as well as a Standby NameNode.
Perform HA testing on NameNode
We can perform a manual HA testing on the NameNode from the Cloudera Manager to verify the NameNode HA we just configured. We will manually stop the Active NameNode and see if the Standby NameNode take up the role of Active NameNode. Follow the steps outlined below to perform the HA testing:
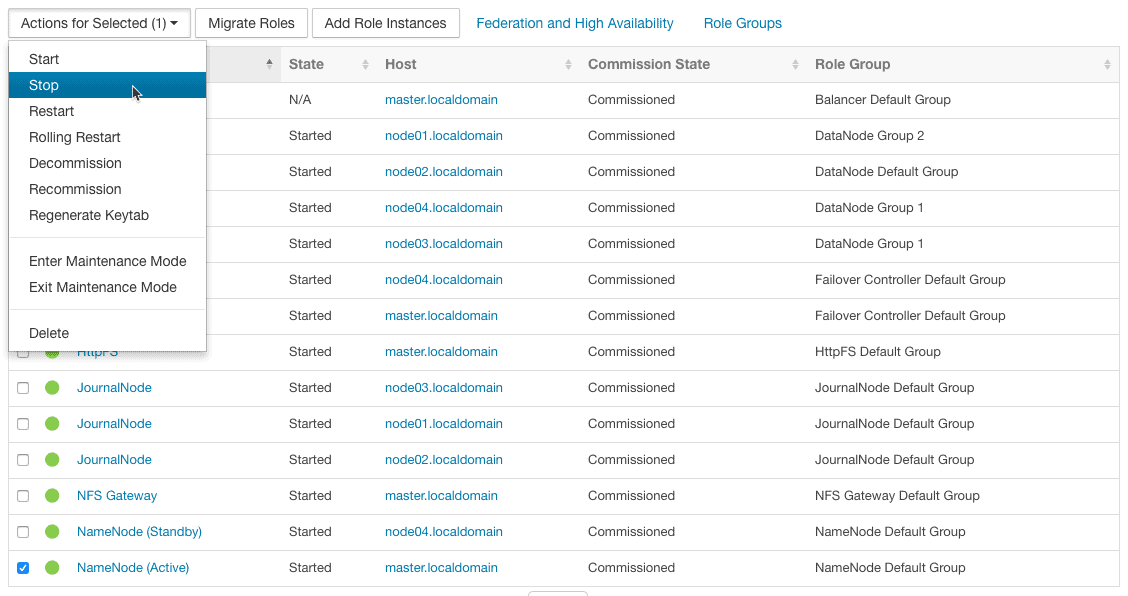
1. Goto Cloudera Manager > HDFS > Instances. Select the active NameNode from the list of instances and select “stop” from the “Actions for selected” drop-down.
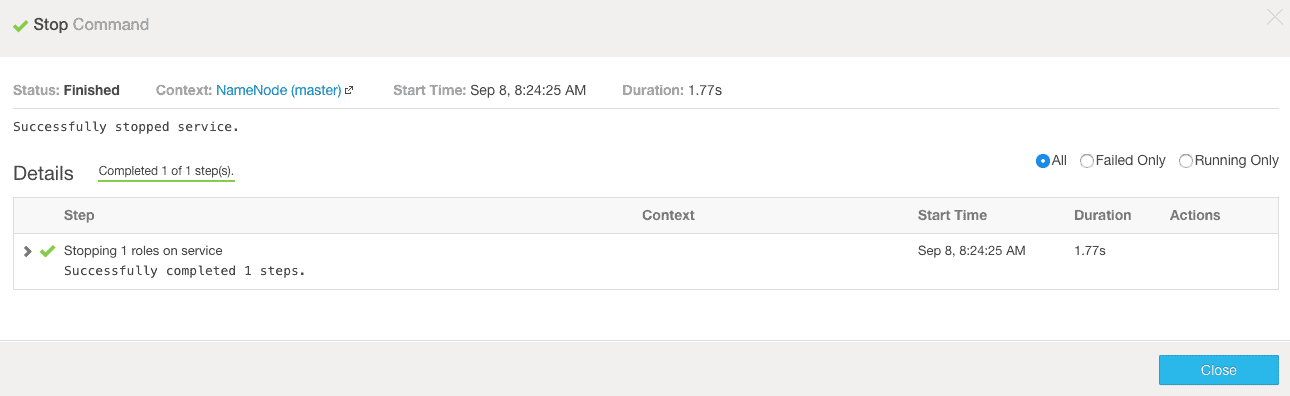
2. Cloudera Manager will go ahead and stop the Active NameNode as shown in the screenshot below.
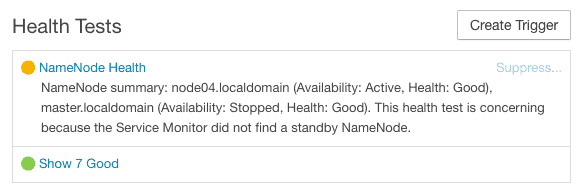
3. You should now see a warning in the Heath Tests section about having only one active NameNode as we do not have a standby NameNode working as of now.
4. Goto the instances page again in the HDFS service to verify the switchover of active NameNode from master to node04 host.

Now if you start the NameNode services on master host back again, it will not take up the Active NameNode role. Instead, it will keep acting as standby NameNode.
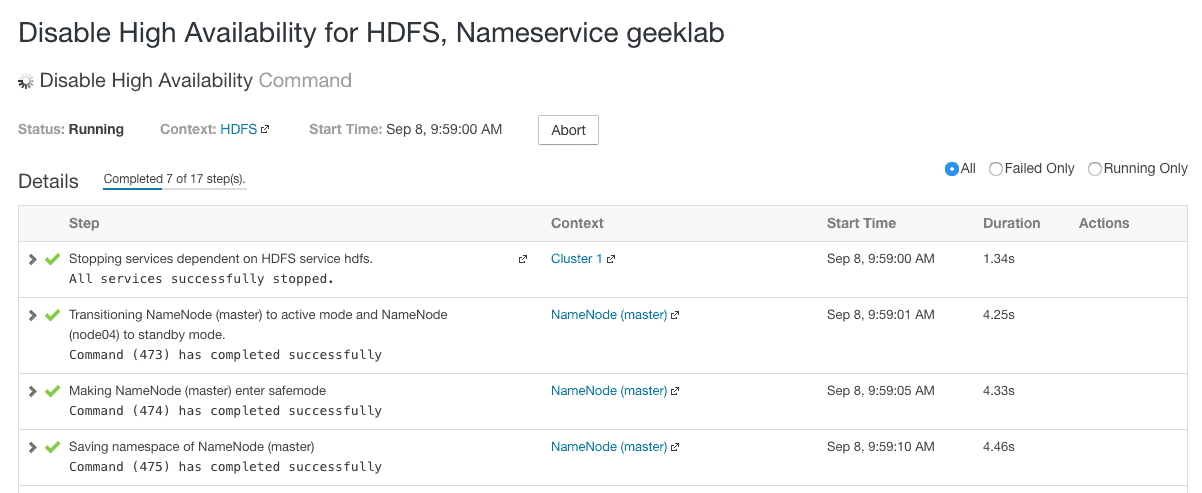
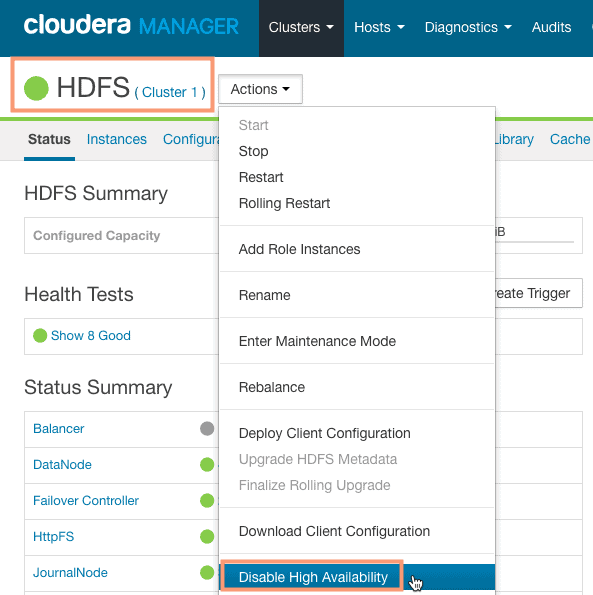
Disable NameNode High Availability
In case you want to disable the NameNode HA configuration follow the steps outlined below.
1. Goto Cloudera Manager > HDFS and select “Disable High Availability” from the “Actions” drop-down.
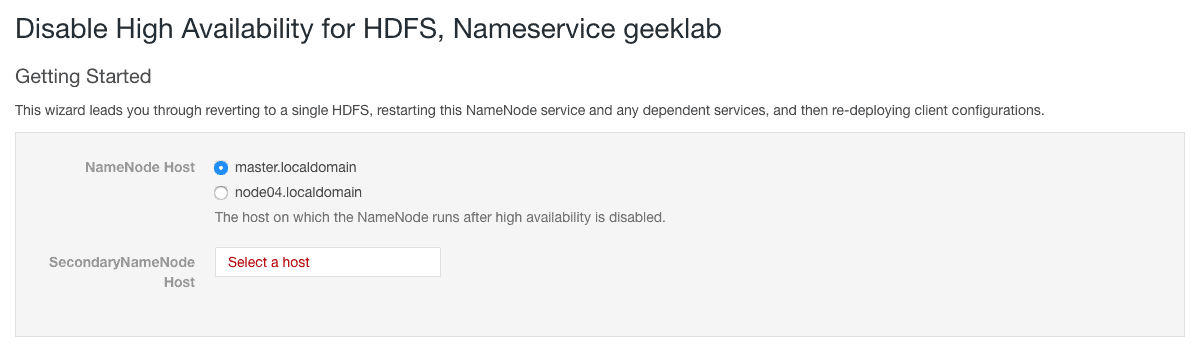
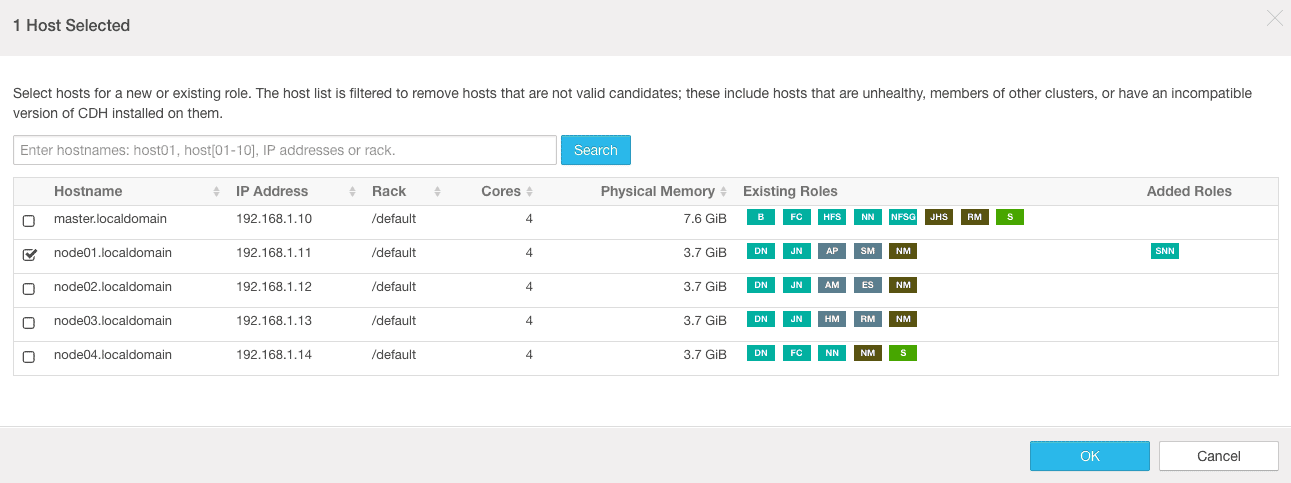
2. On the next screen, we need to select the NameNode out of the 2 available NameNodes. Also instead of Standby NameNode, we have to choose a secondary NameNode.
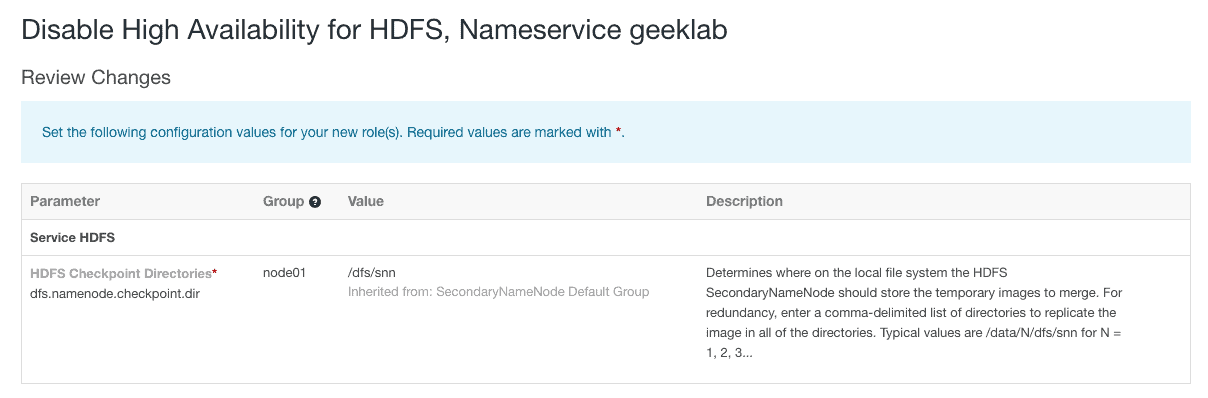
3. On the next screen, review the changes suggested by the Cloudera Manager and continue.
4. In the final step, Cloudera Manager disables the NameNode HA. The following screenshot is a partial screenshot of the successful final step: