HDFS Snapshot
Directories in HDFS can be snapshotted, which means creating one or more point-in-time images, or snapshots, of the directory. Snapshots include subdirectories, and can even include the entire filesystem (be careful with this for obvious reasons). Snapshots can be used as backups or for auditing purposes.
As changes to the filesystem are made, any change that would affect the snapshot is treated specially. For example, if a file that exists in the snapshot is deleted then, even though it will be removed from the current state of the filesystem, its metadata will remain in the snapshot, and the blocks associated with its data will remain on the filesystem though not accessible through any view of the system other than the snapshot.
Enabling HDFS snapshot from Cloudera Manager
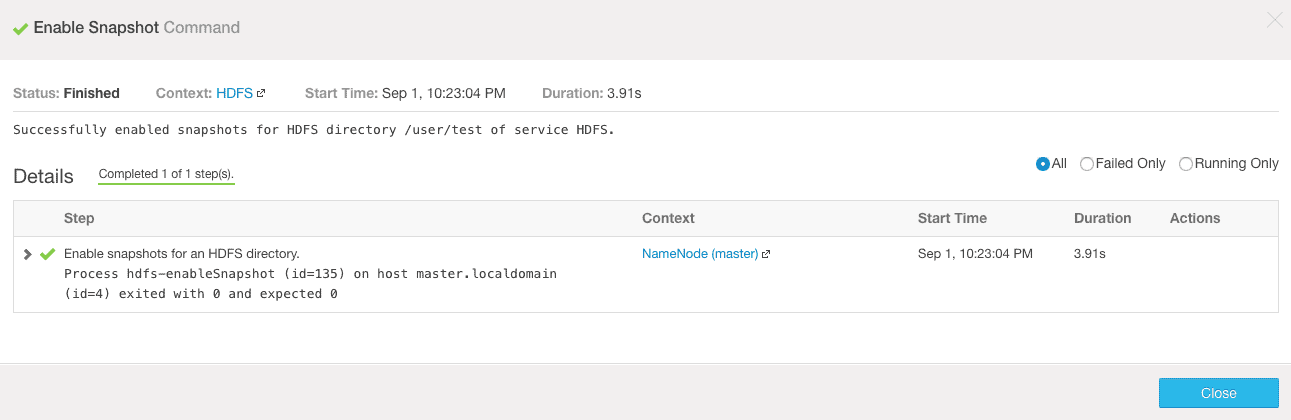
In order to use the HDFS snapshot, it must be enabled first. To enable the snapshot feature from Cloudera Manager goto, Home > HDFS > File Browser. Select the directory for which you want to enable snapshot. The snapshot can be enabled from 2 places on this page as shown in the screenshot below.

Proceed with the directory selected for enabling snapshot.

Wait for the Cloudera Manager to confirm the successful execution of the command for enabling snapshot.
Taking snapshot from Cloudera Manager
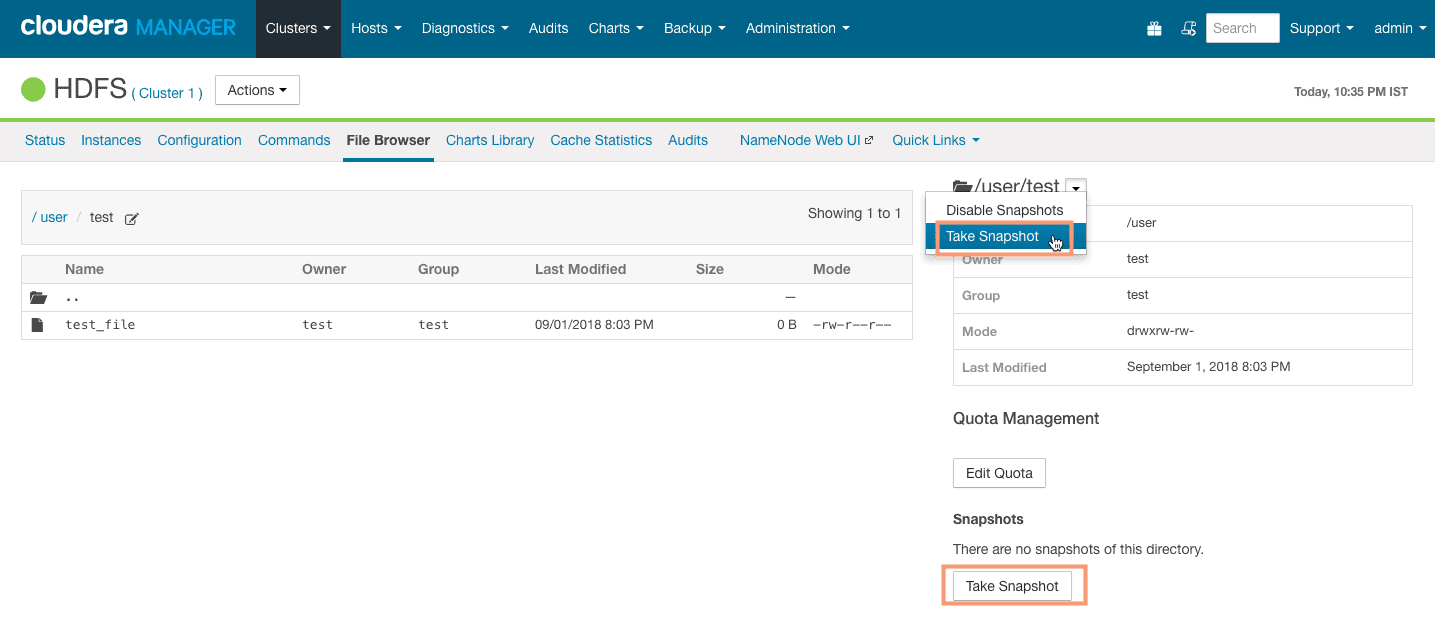
Once you have enabled the snapshot for the directory “/user/test”, you can take your first snapshot. Select the option “take snapshot” from the drop-down as shown in the screenshot below.
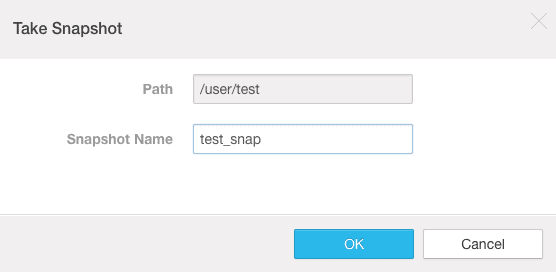
On the next screen, provide the snapshot name (test_snap).
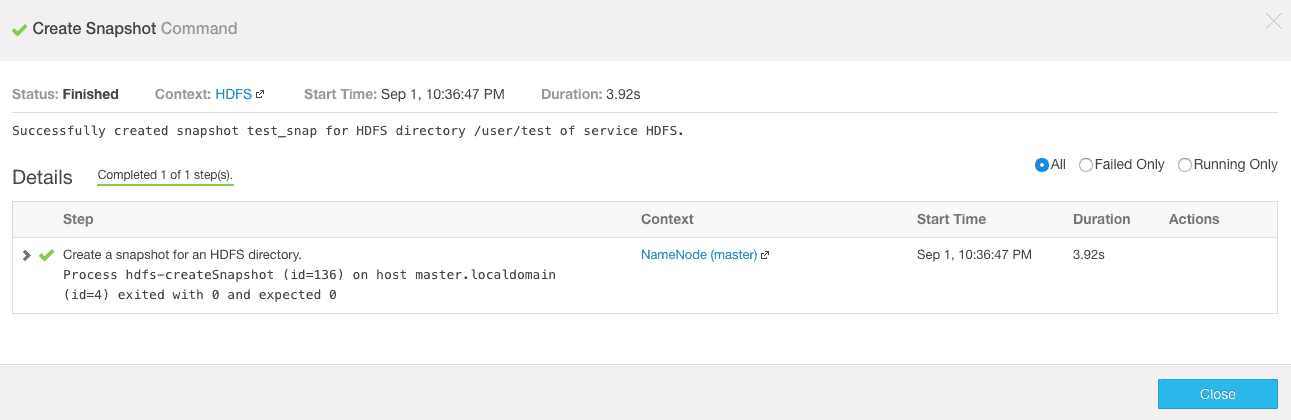
You should see a command completion message as shown in the following screenshot:
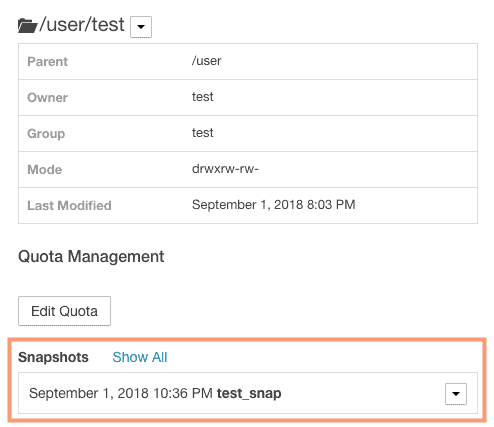
You can verify the newly created snapshot on the file browser page as shown in the screenshot below.
Restoring Snapshots Using Cloudera Manager
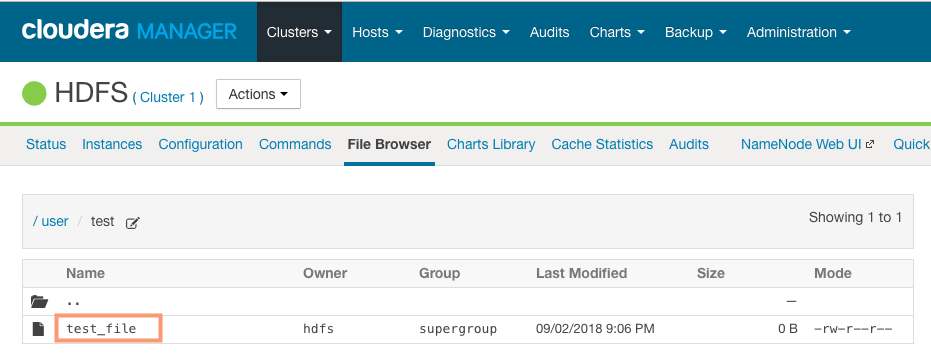
Let’s see how we can restore a snapshot from Cloudera Manager to retrieve an earlier state of HDFS directory. We have a snapshot named “test_snap” created on the directory “/user/test”. We will delete the file “/user/test/test_file” and try restoring it back from the snapshot. Follow the steps outlined below:
1. We will first delete the file “/user/test/test_file” using the commandline.
# su - hdfs
$ hdfs dfs -rm /user/test/test_file
18/09/02 21:02:33 INFO fs.TrashPolicyDefault: Moved: 'hdfs://master.localdomain:8020/user/test/test_file' to trash at: hdfs://master.localdomain:8020/user/hdfs/.Trash/Current/user/test/test_file
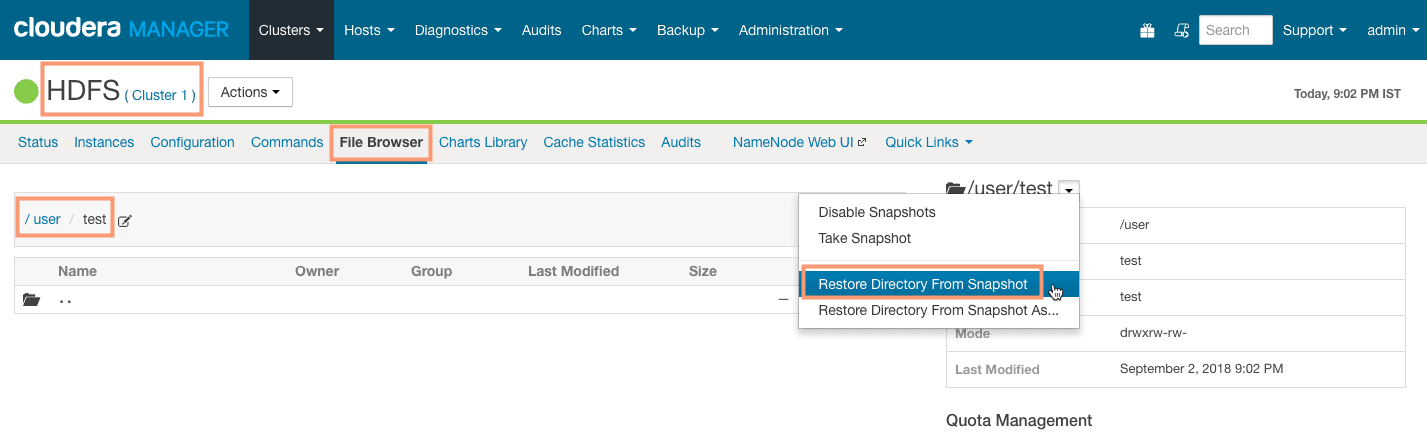
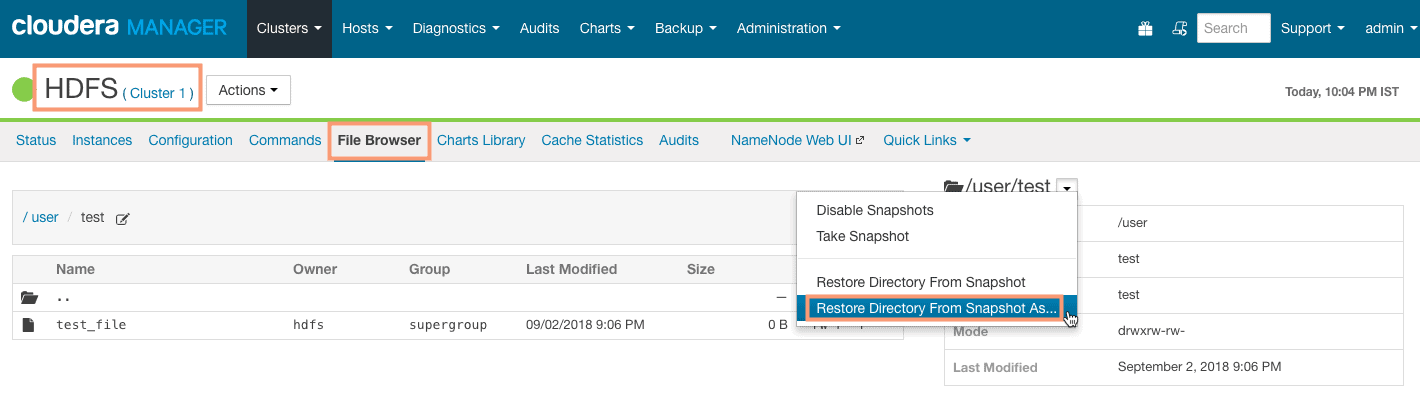
2. To restore the snapshot goto Cloudera Manager > HDFS > File Browser. Select the directory “/user/test” in the File Browser and select the option “Restore Directory from Snapshot” from the dropdown as shown below.
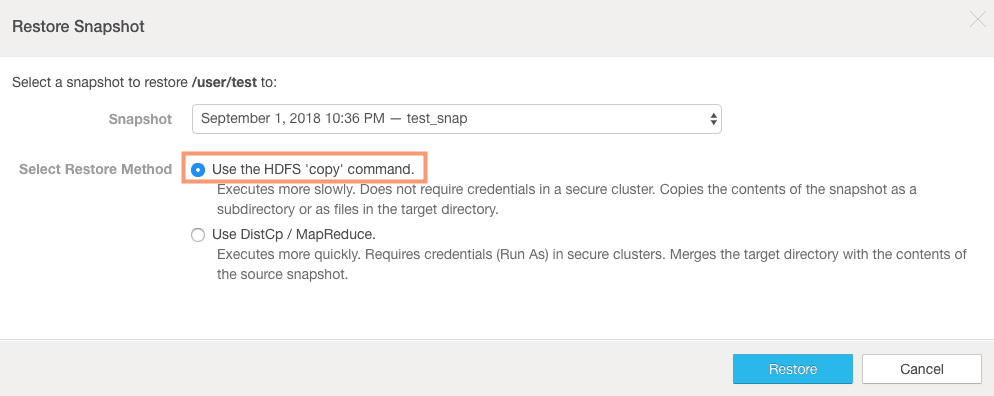
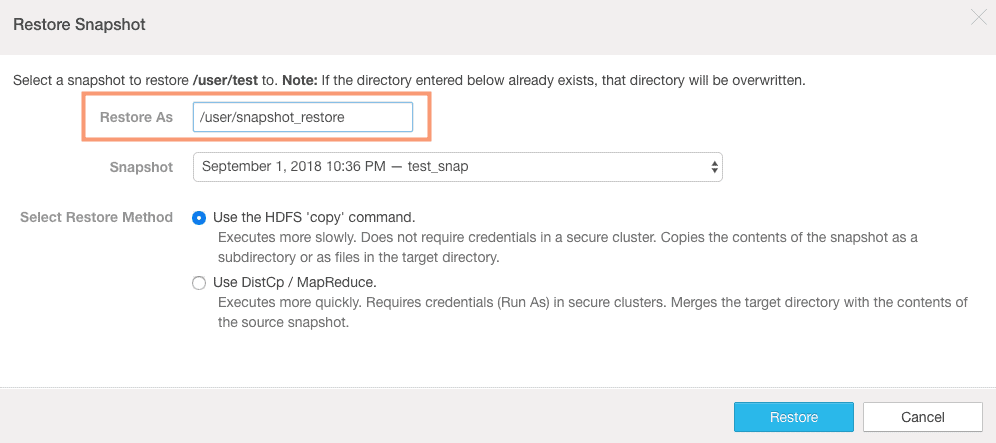
3. If you have multiple snapshots, you can select the desired snapshot for restoring from the drop-down. In my case, I have only one snapshot to restore i.e. “test_snap”. I will go ahead and restore it. Here we have 2 restore methods:
1. Use the HDFS “copy” command – Uses the regular “hdfs dfs -cp” command to copy the files.
2. Use DistCp / MapReduce – Uses the “DistCp” command which in turn uses the MapReduce in the backend to copy the files from snapshot. DistCp is parallel and very fast as compared to normal HDFS copy command.
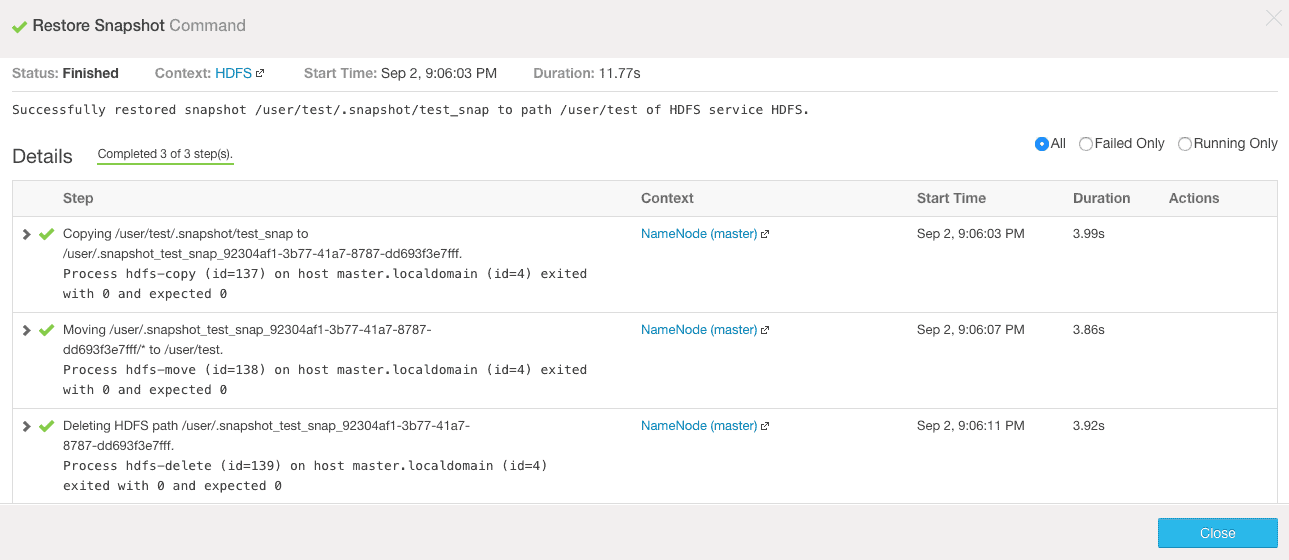
4. The next screen will show the steps taken to restore the directory “/user/test”.
5. On completion, you can verify the file “/user/test/test_file” file being available again.
$ hdfs dfs -ls /user/test
Found 1 items
-rw-r--r--   3 hdfs supergroup          0 2018-09-02 21:06 /user/test/test_file
Restoring Snapshot to a different location
You can also restore the snapshot to a different location than the original. Follow the steps outlined below to restore the snapshot “test_snap” of the directory “/user/test” to a different location (/user/snapshot_restore)
1. Goto Cloudera Manager > HDFS > File Browser. Select the directory to restore and select the option “Restore Directory From Snapshot As“.
2. Provide the directory location to restore the snapshot. Also, select the snapshot to restore and the restore method.
3. You should see a command completion message as shown in the following screenshot:
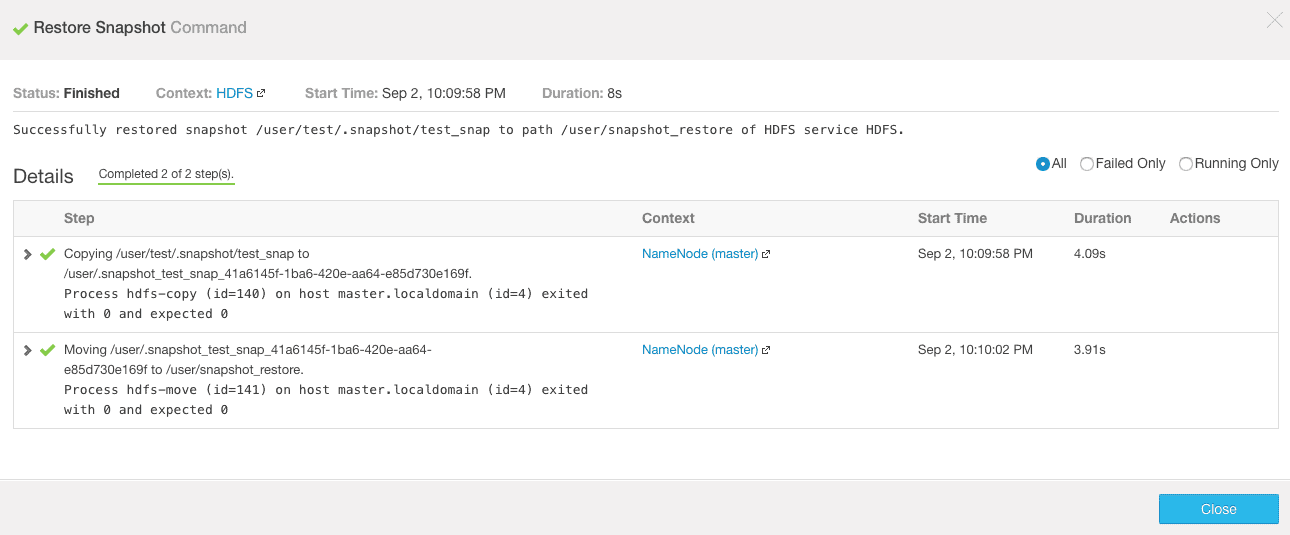
4. Verify the restoration of the snapshot from the Cloudera Manager.

$ hdfs dfs -ls /user/snapshot_restore
Found 1 items
-rw-r--r--   3 hdfs supergroup          0 2018-09-02 22:10 /user/snapshot_restore/test_file
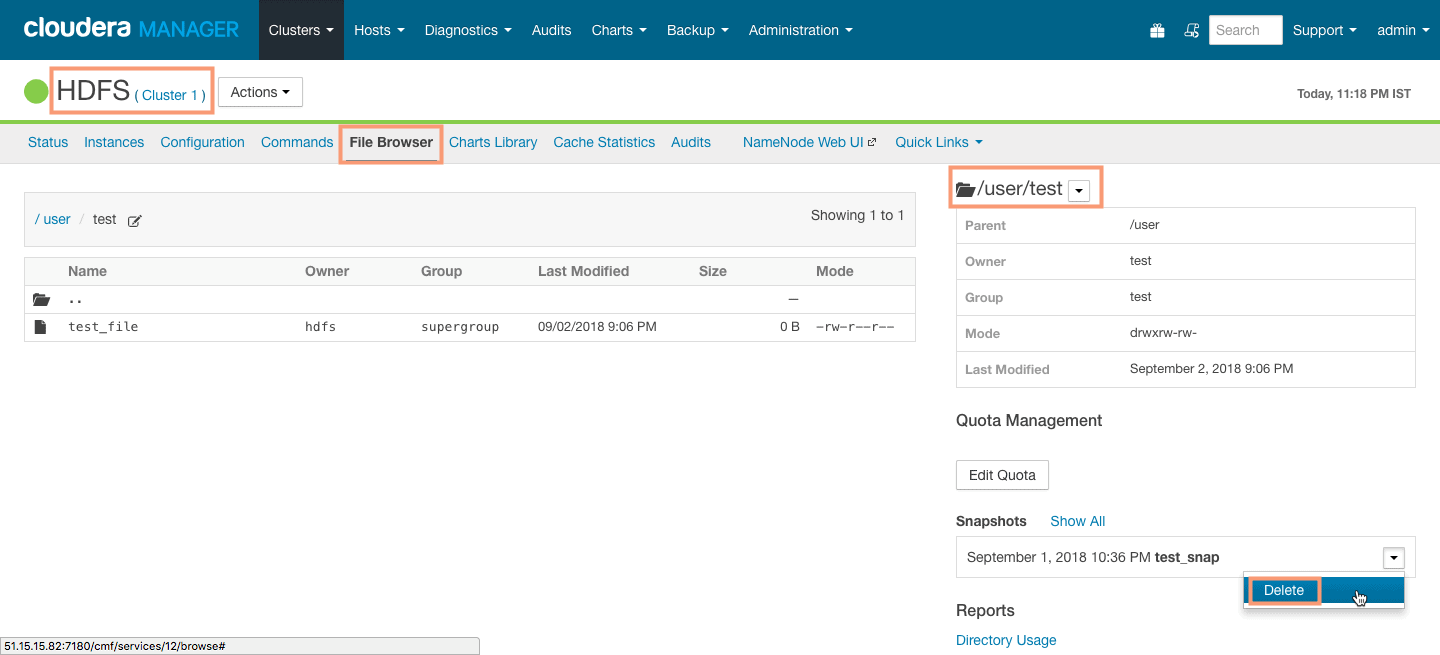
Delete and Disable HDFS snapshot
Delete Snapshot from Cloudera Manager
1. You can delete the snapshot if you no longer need it as shown in the screenshot below.
2. You should see a command completion message as shown in the following screenshot:

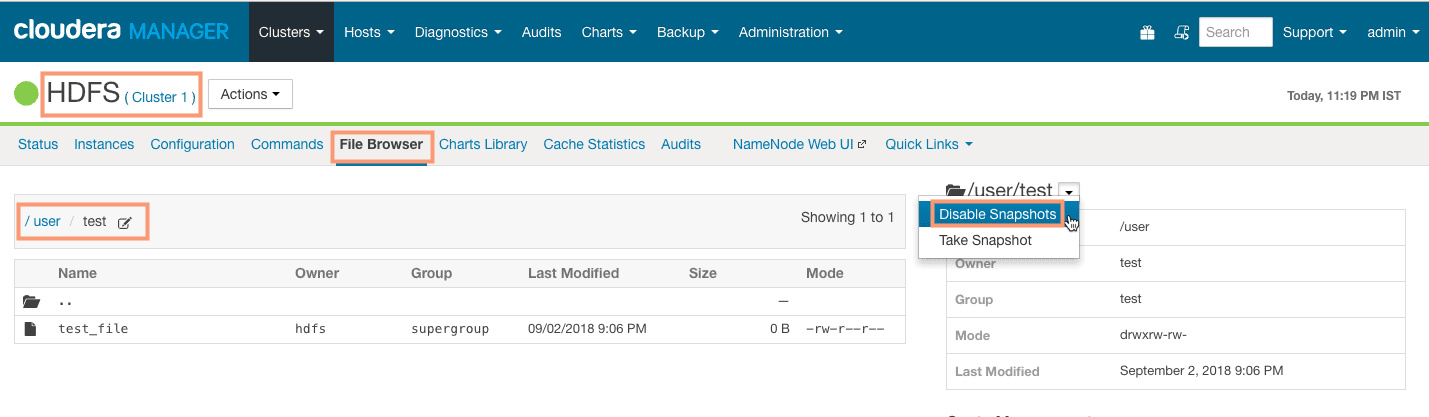
Disable Snapshot from Cloudera Manager
1. Disabling the snapshot on a directory, will not allow any user to create a snapshot on it.
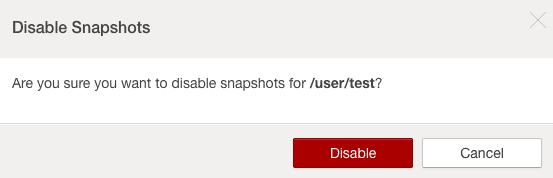
Confirm the disabling the snapshot.
2. You should see a command completion message as shown in the following screenshot:

Creating and restoring HDFS snapshots using command line
You can perform the snapshot creation and restoration tasks defined above using the command line interface as well. To get more details on command line usage, refer the post below. The examples in the below post are performed on a Hortonworks HDP platform, but the command line usage for snapshot creation and restoration is same in all the commercial Hadoop distributions.