One of the most important components of this lab setup is the shared storage. I will be using the software Open-E DSS V7 lite version for the setup. The lite and the professional version software are the same except when we register the software we do it using the free key provided. The lite version by default works for 30 days. Upon registering it, you can use it without any time limitation.
You can download the Open-E DSS V7 lite software from here. Open-E DSS V7 Lite is a free version of Open-E DSS V7. Simply register and download the software from here.
To install the Open-E DSS, create a VM of below configuration :
4 HDD - 10GB each
RAM - 1GB
Processor core - 1
NIC card - 1
Start the installation by selecting the “run software installer” option.

Select a disk out of the 4 disks we added for the installation and start the installation. The installer will ask to reboot the VM after completion of OS installation. Make sure to remove the ISO image from CD-ROM before rebooting.
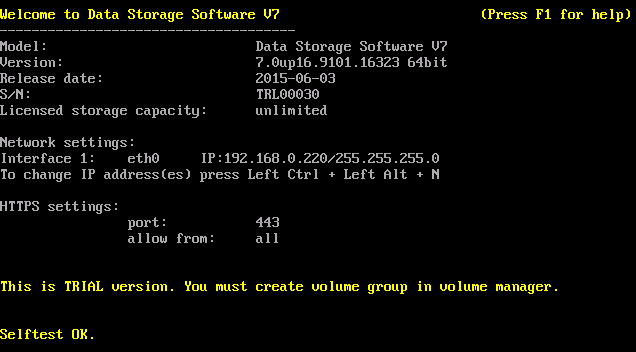
On reboot, you would see the first screen as below, with a random IP address.
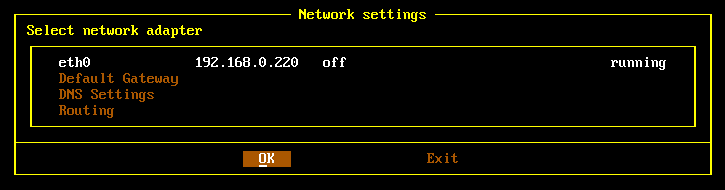
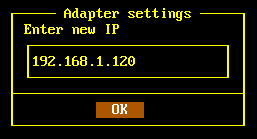
We have to change the IP address to 192.168.1.120. To change the IP address press Left Ctrl + Left Alt + n.
To access the Web interface use the following URL and default password.
password : admin
Initial setup wizard
We have to do some first-time settings on logging. The settings are
1. Language setting – English
2. Password – set a new password which will be used to login to web interface (this will replace the default “admin” password)
3. Ip address – do not change anything here as we have already configured the new IP
4. Time zone – as per your region
5. NTP – leave the default settings
6. Server name – give a hostname for the server
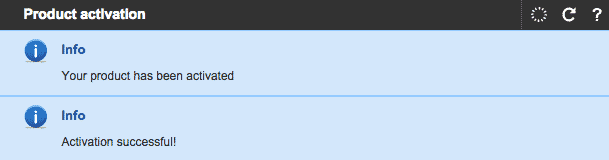
Product activation
You need to activate the product on the first login.
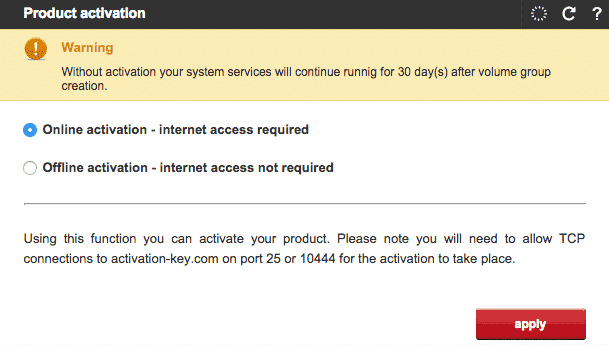
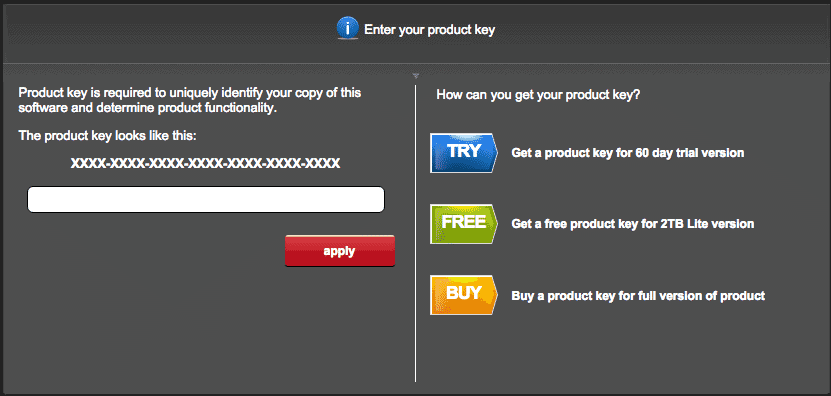
Insert the activation key from the open-e DSS website for your account and apply.
VCS cluster 6.2 LAB : Installing and configuring OEL
VCS cluster 6.2 LAB : Installing Open-E DSS
VCS cluster 6.2 LAB : Configuring Open-E DSS
VCS cluster 6.2 LAB : Installing VCS