In the last post we have installed the openfiler virtual machine. Let us now configure the openfiler to assign iscsi LUNs to the two solaris 10 virtual machines. Login to the web interface using below credentials
Administrator Username: openfiler
Administrator Password: password
Enabling iSCSI services and adding network Access configuration
First step is to enable the iscsi target service. Enable the iSCSI target service and start it in the services tab.
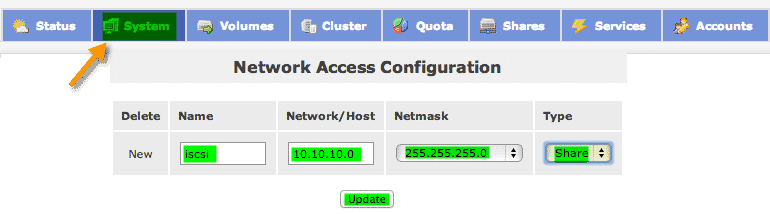
We need to give access to a particular network in order to allow our cluster nodes to configure LUNs for VCS. You can either give access to all the networks (0.0.0.0/0) or a particular network (in our case it 10.10 10.0/24).
Creating Volume group and volumes
To start with we’ll need to create volume group fenvg with 3 volumes respectively.
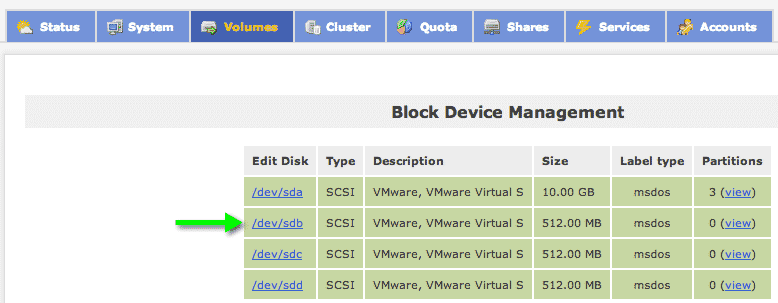
1. Goto Volumes -> Block device (on right hand panel) -> click on the first 512 MB disk that we added.
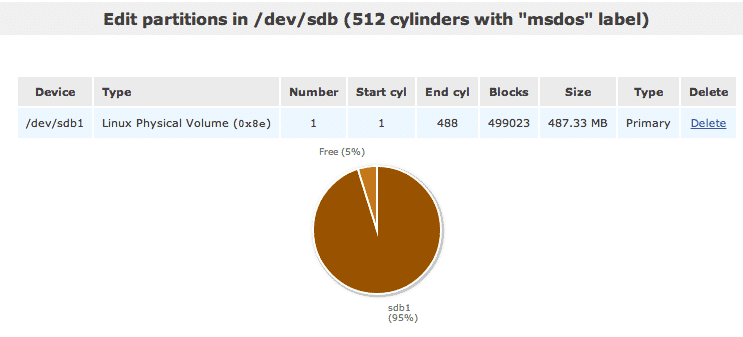
2. Create a partition of entire 512 MB size [ Partition type -> physical volume ]
3. Similarly do it for remaining block devices [ two 512 MB disks ]
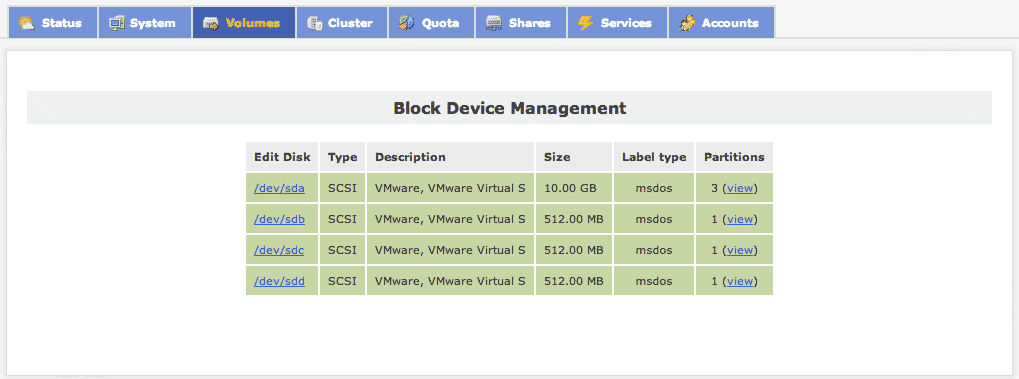
After creating all the 3 partitions you should see them as shown below.
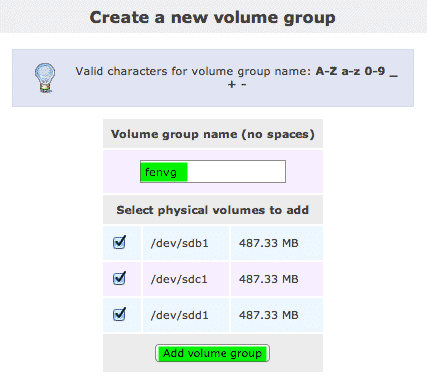
Now create a Volume group named fenvg using the 3 physical volumes of size 512 MB we just created. Goto Volumes > Volume Groups > Create new Volume group.
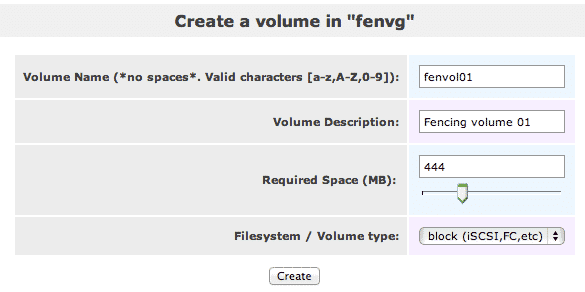
Now add 3 volumes fenvol01, fenvol02 and fenvole03 of equal size [ around 444 MB ] to the volume group fenvg. Remember to select the correct volume group and clicking change button or you may end up creating volumes in some other volume group.
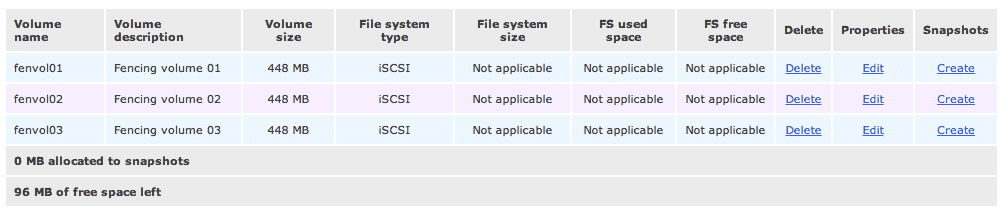
Similarly create 2 more volumes fenvol02 and fenvol03 into the same volume group. At the end the result should look like below.
iSCSI target setup
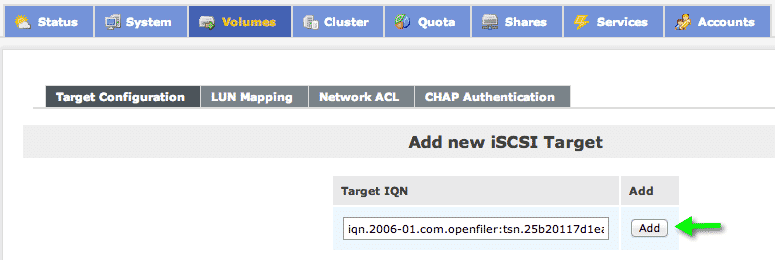
1. Add an iscsi target Goto volumes -> iscsi target (on right hand panel) -> target configuration tab -> click add to add the iscsi target
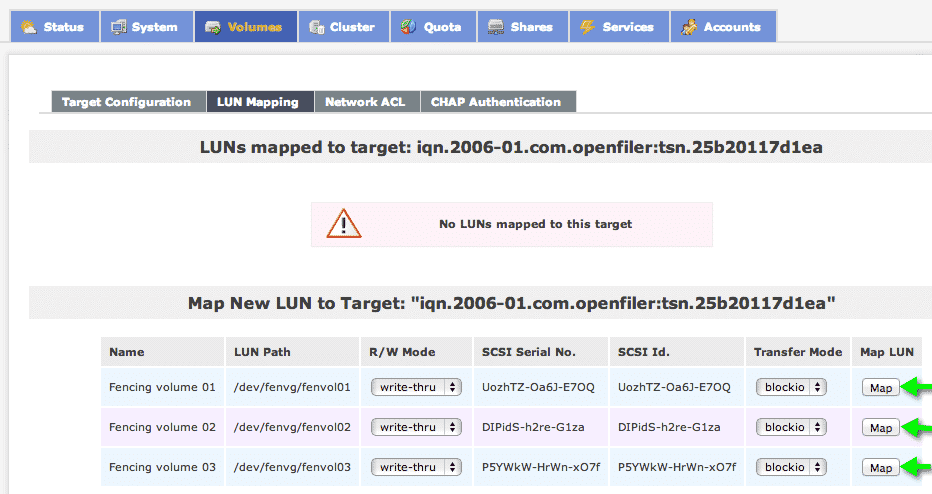
2. Now Map all the LUNs created to this iscsi target. Goto LUN mappings tab -> click map button for each LUN
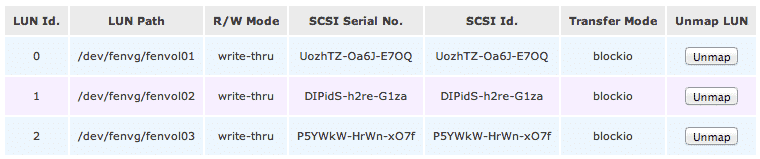
The 3 LUNS would be mapped as shown below.
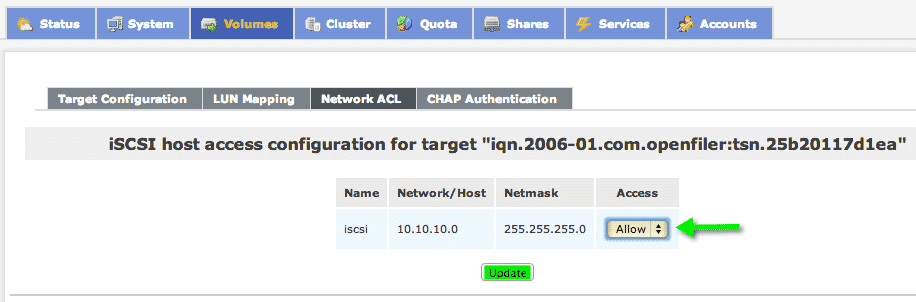
3. Allow access to these LUNs from the 10.10.10.0/24 network. Goto Network ACL tab -> Allow access to the 10.10.10.0/24 network which we created in the first step.
Initiator Configuration [ Adding LUNs at solaris end ]
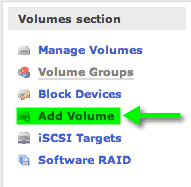
The final step is to add these iSCSI volumes to the solaris nodes that we have created.
1. Enable the iscsi initiator service
geek01# svcs *iscsi*
STATE STIME FMRI
disabled 0:37:08 svc:/system/iscsitgt:default
online 0:37:24 svc:/network/iscsi/initiator:default
geek01# svcadm enable initiator
2. Enable the send targets mode
geek01# iscsiadm modify discovery --sendtargets enable
geek01# iscsiadm list discovery
Discovery:
Static: disabled
Send Targets: enabled
iSNS: disabled
3. Configure IP address of iscsi target [ openfiler IP ]
geek01# iscsiadm add discovery-address 10.10.10.10
geek01# iscsiadm list discovery-address
Discovery Address: 10.10.10.10:3260
geek01# iscsiadm list target
Target: iqn.2006-01.com.openfiler:tsn.25b20117d1ea
Alias: -
TPGT: 1
ISID: 4000002a0000
Connections: 1
4. Scan for the new iscsi devices
geek01# devfsadm -Cv -i iscsi
5. Verify
Confirm the newly added iscsi disks by firing format command. You should be able to see all 3 LUNs added to this node. Now similarly add the same LUNs to the other node using exactly the same steps given above.
geek01# format
Searching for disks...done
AVAILABLE DISK SELECTIONS:
0. c1t0d0 <DEFAULT cyl 2085 alt 2 hd 255 sec 63>
/pci@0,0/pci15ad,1976@10/sd@0,0
1. c2t2d0 <DEFAULT cyl 445 alt 2 hd 64 sec 32>
/iscsi/disk@0000iqn.2006-01.com.openfiler%3Atsn.25b20117d1ea0001,0
2. c2t3d0 <DEFAULT cyl 445 alt 2 hd 64 sec 32>
/iscsi/disk@0000iqn.2006-01.com.openfiler%3Atsn.25b20117d1ea0001,1
3. c2t4d0 <DEFAULT cyl 445 alt 2 hd 64 sec 32>
/iscsi/disk@0000iqn.2006-01.com.openfiler%3Atsn.25b20117d1ea0001,2
Specify disk (enter its number): ^C
“Huh!” Finally our setup is complete and the only step remaining is to install the VCS software itself. Lets install the vcs software in the next post. Stay tuned!
VCS cluster 5.1 LAB using VMware workstation : Installing solaris
VCS cluster 5.1 LAB using VMware workstation : Installing openfiler
VCS cluster 5.1 LAB using VMware workstation : Configuring openfiler
VCS cluster 5.1 LAB using VMware workstation : Installing VCS