Last time we were talked about jpegoptim, jpegtran, optipng and pngcrush for image optimization. Today, We will review ImageMagick. Use ImageMagick® to create, edit, compose, or convert bitmap images. It can read and write images in a variety of formats (over 200) including PNG, JPEG, GIF, HEIC, TIFF, DPX, EXR, WebP, Postscript, PDF, and SVG. Use ImageMagick to resize, flip, mirror, rotate, distort, shear and transform images, adjust image colors, apply various special effects, or draw text, lines, polygons, ellipses and Bézier curves.
Installation of imagemagick
On Debian, this utility is included in packages:
# apt-get install imagemagick
Example of imagemagick usage
GIF and PNG are lossless formats, in that the compression process does not make any visual modification to the images. For still images, PNG achieves better compression ratio with better visual quality. For animated images, consider using video element instead of a GIF, to achieve better compression.
- Always convert GIF to PNG unless the original is animated or tiny (less than a few hundred bytes).
- For both GIF and PNG, remove alpha channel if all of the pixels are opaque.
For example, you can use convert binary to optimize your GIF and PNG images with the following command (parameters inside brackets are optional):
$ convert INPUT.gif_or_png -strip [-resize WxH] [-alpha Remove] OUTPUT.png

cuppa.png (1,763 Bytes)
$ convert cuppa.png -strip cuppa_converted.png

cuppa_converted.png (856 Bytes)
JPEG is a lossy format. The compression process removes visual details of the image, but the compression ratio can be 10x larger than GIF or PNG.
- Reduce quality to 85 if it was higher. With quality larger than 85, the image becomes larger quickly, while the visual improvement is little.
- Reduce Chroma sampling to 4:2:0, because the human visual system is less sensitive to colors as compared to luminance.
- Use progressive format for images over 10k bytes. Progressive JPEG usually has a higher compression ratio than baseline JPEG for large images, and has the benefits of progressively rendering.
- Use grayscale color space if the image is black and white.
For example, you can use convert binary to optimize your JPEG images with the following command (parameters inside brackets are optional):
$ convert INPUT.jpg -sampling-factor 4:2:0 -strip [-resize WxH] [-quality N] [-interlace JPEG] [-colorspace Gray/sRGB] OUTPUT.jpg
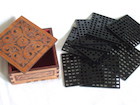
puzzle.jpg (13,501 Bytes)
$ convert puzzle.jpg -sampling-factor 4:2:0 -strip -quality 85 -interlace JPEG -colorspace sRGB puzzle_converted.jpg